File History is a Windows feature that backs up versions of your files in Libraries (Documents, Music, Pictures, Videos) and Desktop folders. Therefore, this can be a great asset to keep versions of our gig files. ![]()
- In Windows 10 you can also select an optional, custom folder where you keep gig files.
- In Windows 11 they removed this feature to add a custom folder…

Why is this a neat feature?
- Over time, you’ll have a complete history of your files. You can easily revert the version that you (say) worked on yesterday (or a month ago!).
- If you accidentally delete your gig files or they appear to be damaged (perhaps a bad sector on a HDD) you can restore them.
- If your PC gets infected with ransomware, there is a chance to save your work!
You can use an external drive (thumb drive or external HDD/SSD) or a network drive. But this is not the option, in my opinion: you can easily lose your thumb drives, and perhaps you build your gigs outside your home network (home NAS). I wanted to have this feature on one of my local drives. So what to do?
Here’s a workaround that works very well → we’ll use a virtual hard disk (VHDX file).
This is how I did it:
[1] I created a new folder “FileHistory” on the D:\ partition
[2] Windows Key + X and select Disk Management. Click on the Action menu and select Create VHD.
[3] Select the parameters as on the screenshot:
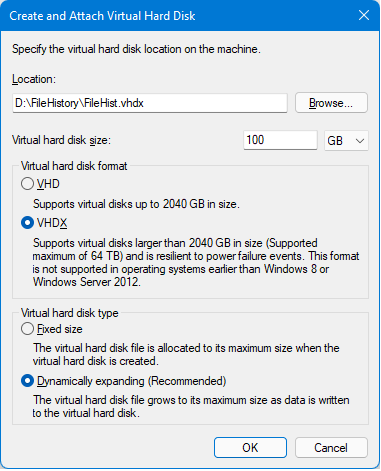
[4] Right click on the new disk and select Initialize disk. Select the GPT partition table.
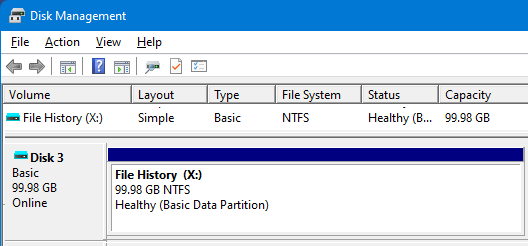
[5] OK, now the disk is initialized, online, but not formatted. Right click on Unallocated and select New Simple Volume. Follow the wizard and assign it a drive letter (e.g. X), select NTFS as file the system and volume label “File History”. Here’s the result:
[6] Now that you have a removable drive (you can access it from “This PC”), you can use it with File History, so click Start and type in File History. Open the application.
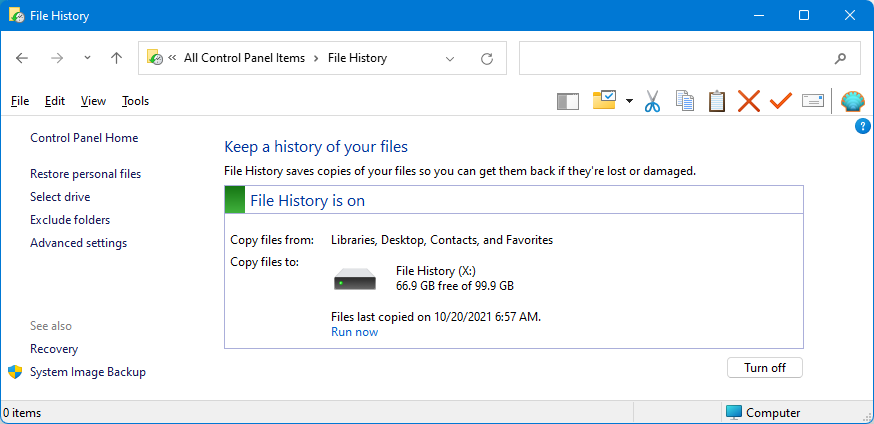
[7] Configure File History:
- Click Select drive and select the File History (X:)
- I excluded all folders (Pictures, Saved Pictures, Videos, Music, Camera Roll) and left only Documents and Desktop
- In Advanced settings, I selected that every 10 minutes it saves copies and saves them Until space is needed.
After the backup process finishes, you’ll be able to see your versions of files stored in Documents and Desktop folders.
Here’s an example:
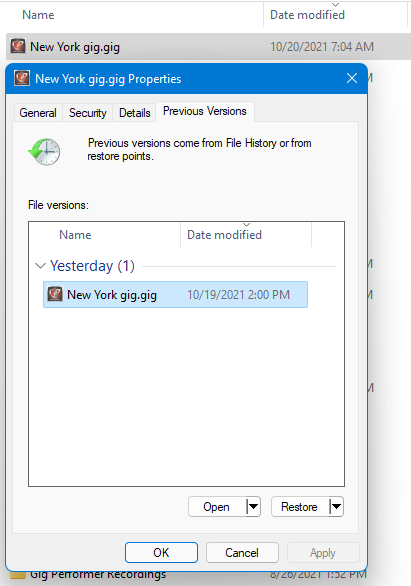
Simply right click on a file and under Previous Versions I can see a version of a gig file from yesterday.
~
Of course, you can Turn off this feature whenever you want (i.e. before a gig), just click Turn Off.
Enjoy! ![]()
–
![]() Dropbox → Dropbox Backup And Workflow
Dropbox → Dropbox Backup And Workflow