After my first attempt to build a rackspace for general purpose use
And, after reviewing
from @schamass, I found I still needed something more even though he did an outstanding job and his tool suits many of my needs. It came in the form of combining the two into a single rackspace.
I needed this for the following:
- Easy access to my favorite, most used VSTs (at least 12)
- Work with 1 or 2 keyboards of various sizes (5 to 7 octaves)
- Allow layering multiple VSTs in each keyboard section
- Allow each keyboard to be full or split, providing up to 4 sections when using 2 keyboards
- Ability to adjust the split point for each keyboard
- Allow adjusting the notes for each quadrant by ± 2 octaves
- Auto-bypass of unused VSTs to avoid CPU overload
WHY???
- Sometimes I just want to play around without dealing with voice load times
- I may carry a very small, light-weight keyboard to sit in with a band
- I may carry 2 full keyboards to sit in with a band
- I don’t want to build out a full rack for a song I ultimately don’t end up getting to play
- I may end up playing along on a song I don’t know and don’t have a rack built for
- The list goes on…
I don’t plan to perform with it unless it was one of those family reunion type sing-along things. But it obviously fills a gap for me.
I don’t want to write a book on how it works. And I would expect anyone else that decided to use this would certainly want to enhance it by adding effects and controls they frequently use on specific VSTs. So, I’m putting it out there as a starter kit for anyone needing something similar.
@schamass did a great job of explaining how to do things with his rackspace. This one is very similar and all of those instructions should apply. What’s really different about this one is the layering and splitting.
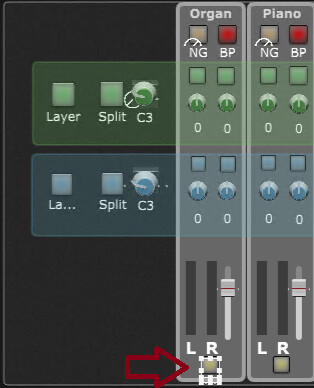
It basically provides 4 modes for each keyboard.
NO LAYERING AND NO SPLIT
In this mode, you can select 1 VST for each keyboard. And they can be the same VST. It is important to know that the split is still in effect. It’s just that the top note of the lower section is 1 semitone below the low note of the top section. It behaves like a full keyboard into you decide to adjust the octave of either section. But that can work for you on things like organs on a smaller keyboard where the control keys are out of range of the keyboard. You can adjust the lower octave up and lower the split point to just above that. Then you can adjust the upper octave to put the notes you really want in range, be that lower or higher. Many of the VSTs I use have these types of “settings” controls that are out of range when I use a 4 or 5 octave keyboard.
NO LAYERING WITH SPLIT
All the “split” button really does is make the left and right enable buttons independent radio groups. When split is off, you select either left or right of a VST and both come on. When “split” is on, the left and right radio groups are independent. So, if you select one VST for the upper section (right button) and a different one for the lower (left), they don’t affect each other. When you select a different VST for either, all of the others of same left/right will be disabled automatically.
WITH LAYERING AND NO SPLIT
When layers is on, all it really does it disable radio button groupings. If one is already on and you turn on another, they are both on. You can turn either off by clicking it again. The buttons for each VST work in pairs just like when layers is off.
WITH LAYERING AND SPLIT
You are on your own. The only thing automatic now is bypass will get set when you turn something off and that VST is no longer assigned to any quadrant. You can select whatever VST(s) you want for any section and you can adjust the octave for each VST for each quadrant. Maybe you want to play something like “Walk of Life” where that accordion sound is on your right hand all the time but is mirrored by a DX7 like sound between verses. You could have the accordion in 2 quadrants and add DX7 to one of those, set the octaves appropriately, and now all you have to do is play in a different quadrant to change the sound instead of worrying about changing variations of turning some control on or off. I play that song enough it has its own rackspace. I just threw it out as a suggestion of possibilities.
BEYOND ALL OF THAT
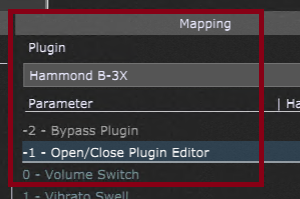
Seems every VST has its quirks. I end up with some special filter or control on many of them so they all behave correctly or so I can take advantage of features. Since I expect we don’t all have all of the same VSTs and/or favorites, I avoided over-personalizing this for my use before passing it on to the community. You do your thing and I will do mine. I did want to show an example though. That Hammond B3-X from IK Multimedia has a special feature I want to take advantage of. If you have the top keyboard send to channel 1 and the lower to channel 2, you get a true dual manual instrument, each with individual controls. While I always have all of my MIDI controls come in on channel 1 and have all my VSTs accept channel 1, I did add a GP MIDI Rechannelizer between the lower quadrants and the Hammond VST to shift channel 1 to 2. When I select the organ in the lower quadrants, it always plays whatever the lower manual settings are and the upper quadrants always play what the upper settings are.
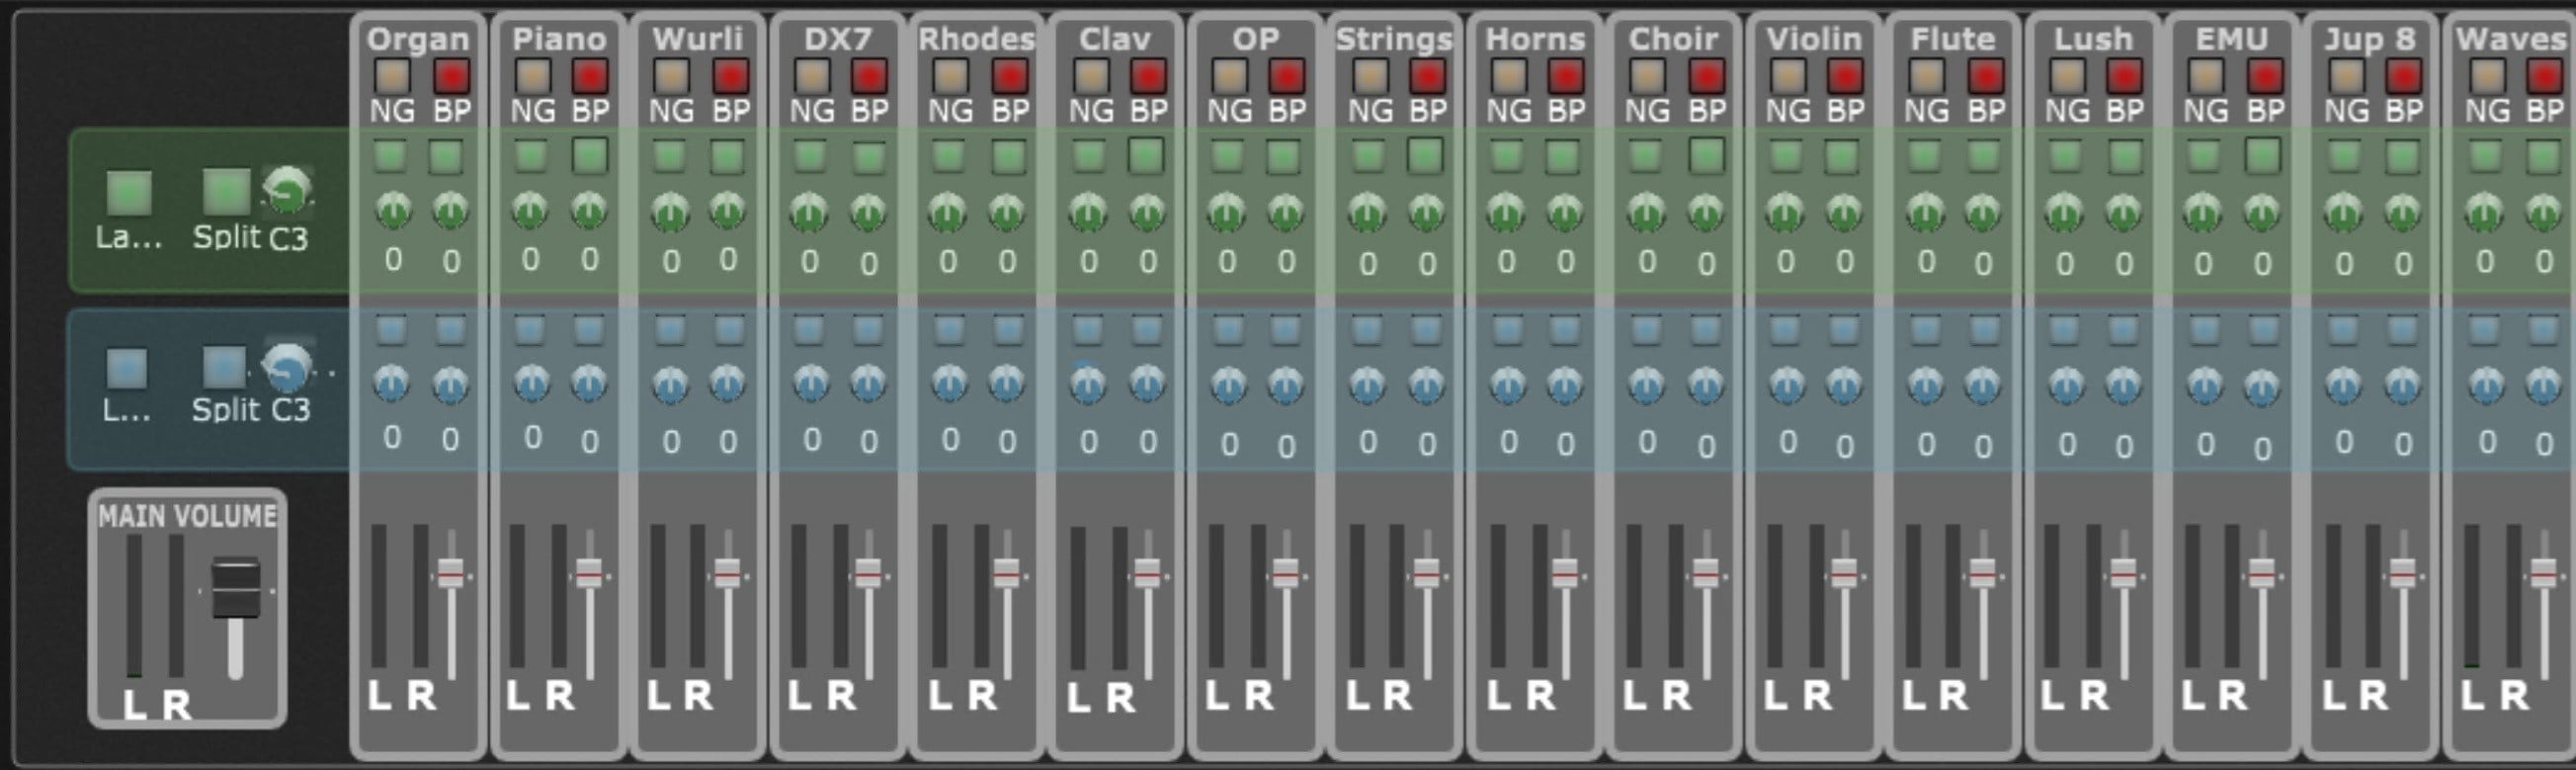
THE VSTs I HAVE SET UP
Just in case it helps you make use of this, here’s what I have in place:
- Organ - IK Multimedia - Hammond B-3X
- Piano - Native Instruments - The Grandeur
- Wurli - Arturia - Wurli V3
- DX7 - Native Instruments - DX7 EP
- Rhodes - Arturia - Stage-73 V2
- Clav - Arturia - Clabinet V
- OP - Arturia - OP-Xa V
- Strings - Native Instruments - Strings Pro 2
- Horns - Native Instruments - Session Horns Pro
- Choir - Native Instruments - Choir Vowels
- Violin - Native Instruments - Stradvari Violin
- Flute - Native Instruments - Flute
- Lush - D16 Group Audio Software - Lush 2
- EMU - Arturia - Emulator II V
- Jup 8 - Arturia - Jup-8 V4
- Waves - Waves - Waves Harmony Stereo
–
Download: Playtime.gig (16.7 MB)