Since version 4, Gig Performer has come bundled with Overloud’s TH-U Essential version - for those that haven’t opened it, this is a guitar amp sim/FX modeller (and a great one at that).
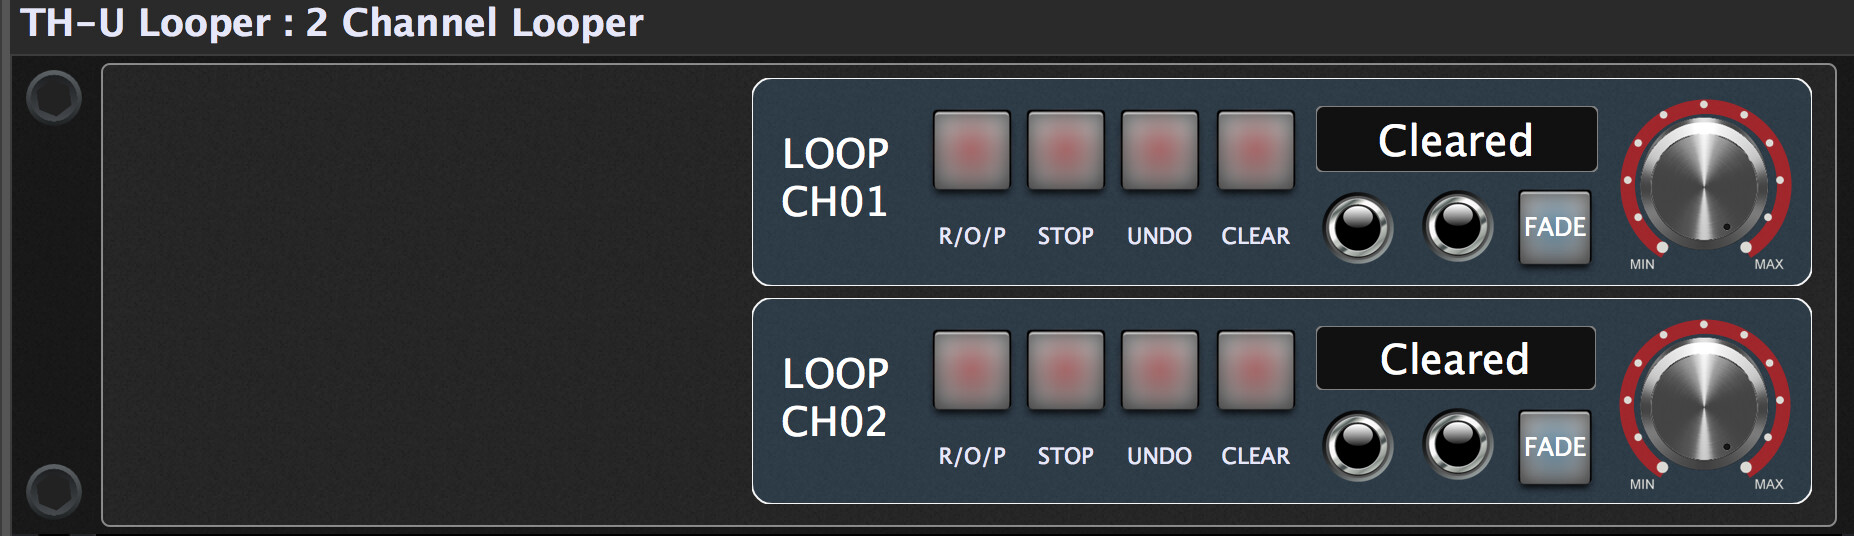
But what it also has in it is a 2-track looper, hidden away in the top right corner. Which means that GP4 actually comes with a looper!
It works really well and has host tempo quantization, undo, clear, overdub, etc to put it pretty much on par with Ableton Live’s built in looper; but it also has two separate tracks which is helpful and obviously doesn’t require routing audio out of GP in to Live.
However, there are some downsides:
- Overloud have not made the controls for the looper automatable which means they cannot be assigned to GP widgets
- The controls are MIDI mappable, but have a slightly weird design which - whilst possible - makes it inconvenient to control with most MIDI controllers
- There is no feedback of the looper state so widgets or MIDI controllers with LEDs, screens etc cannot show you what is happening with the looper.
So is it all doom and gloom?
No! Gig Performer to the rescue!
I’ve created a Scriptlet that attaches to the MIDI in port of TH-U to give full control over the looper in a sensible manner and with feedback available! Now you can control the looper from rackspace widgets as you would any other plugin and are able to get feedback back to your MIDI controller, OSC display, etc as you like.
I’ve tested it and it seems robust - but let me know if anything doesn’t work!
There are four files attached:
The main one - and only one you really need - is the THU Looper Control Scriptlet. This is attached as a scriptlet preset; simply add a scriptlet block and load this preset and then ‘attach’ it to THU as below.
TH-U Looper Control Scriptlet.gpp_internal (22.3 KB)
There is also a rack panel with the full control set - you can either use this directly or as a starting point for your own rack panel.
TH-U Looper Control Panel.gppanel (318.7 KB)
Then there is a gig file file with the whole lot in connected up so you can have a play:
THU Looper Control Gig.gig (346.0 KB)
And finally a THU preset which is completely blank that you can use to make setup quicker.
TH-U Looper Blank.gpp_vst3 (4.2 KB)
Usage notes are in the Gig File, but also pasted below for convenience.
Enjoy and let me know when you break it!
========= OVERLOUD TH-U LOOPER CONTROL ===========
The THU Looper Control scriptlet allows control of THUs internal looper with a common layout of momentary switches (rather than the slightly obscure way it’s implemented in THU). It also allows feedback to an external device which is not possible by MIDI mapping to THU alone.
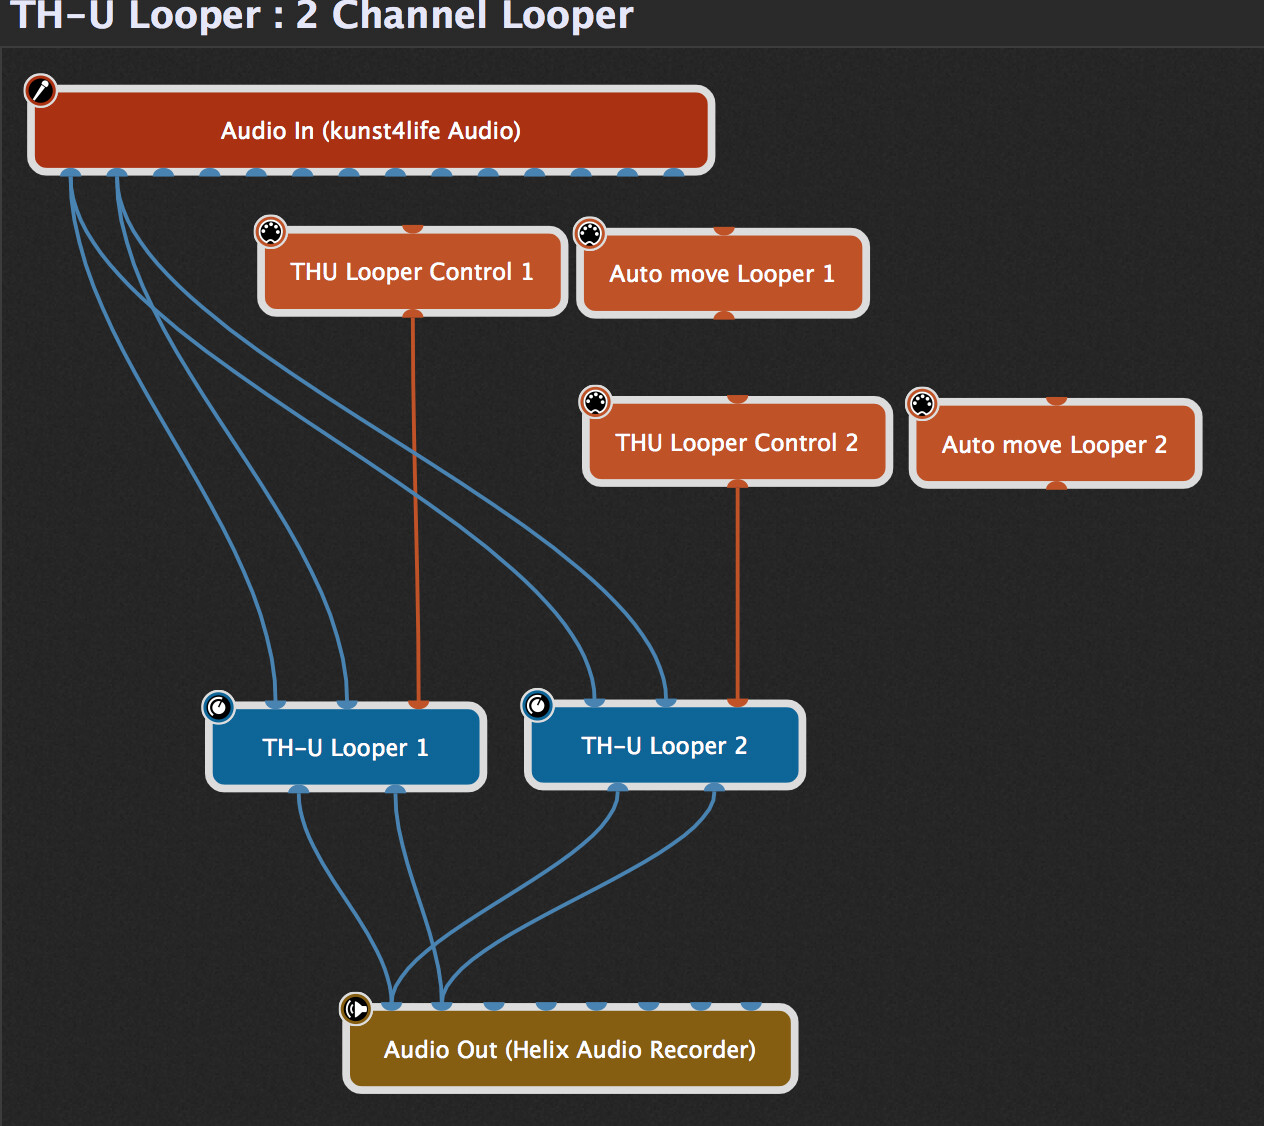
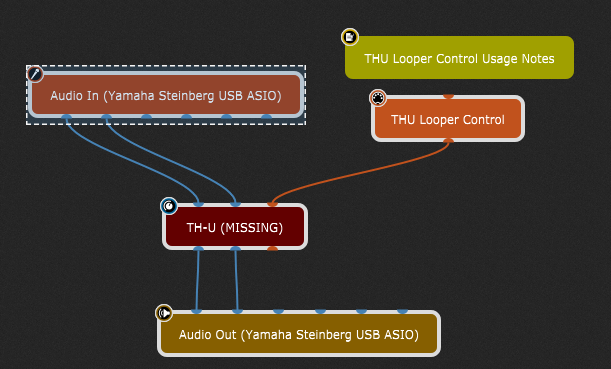
Wiring Setup:
- Add an instance of THU and remove anything you don’t want to use (use the preset supplied with the scriptlet to start from a blank slate)
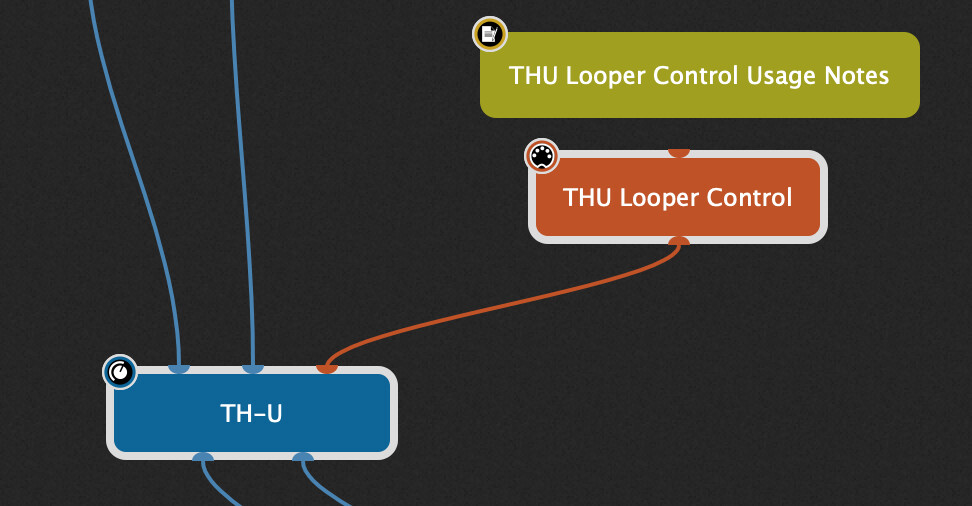
- Import the THU Looper Control scriptlet and add it to the rackspace
- Connect the MIDI out of the scriptlet to the MIDI In of TH-U
Rack Panel Setup:
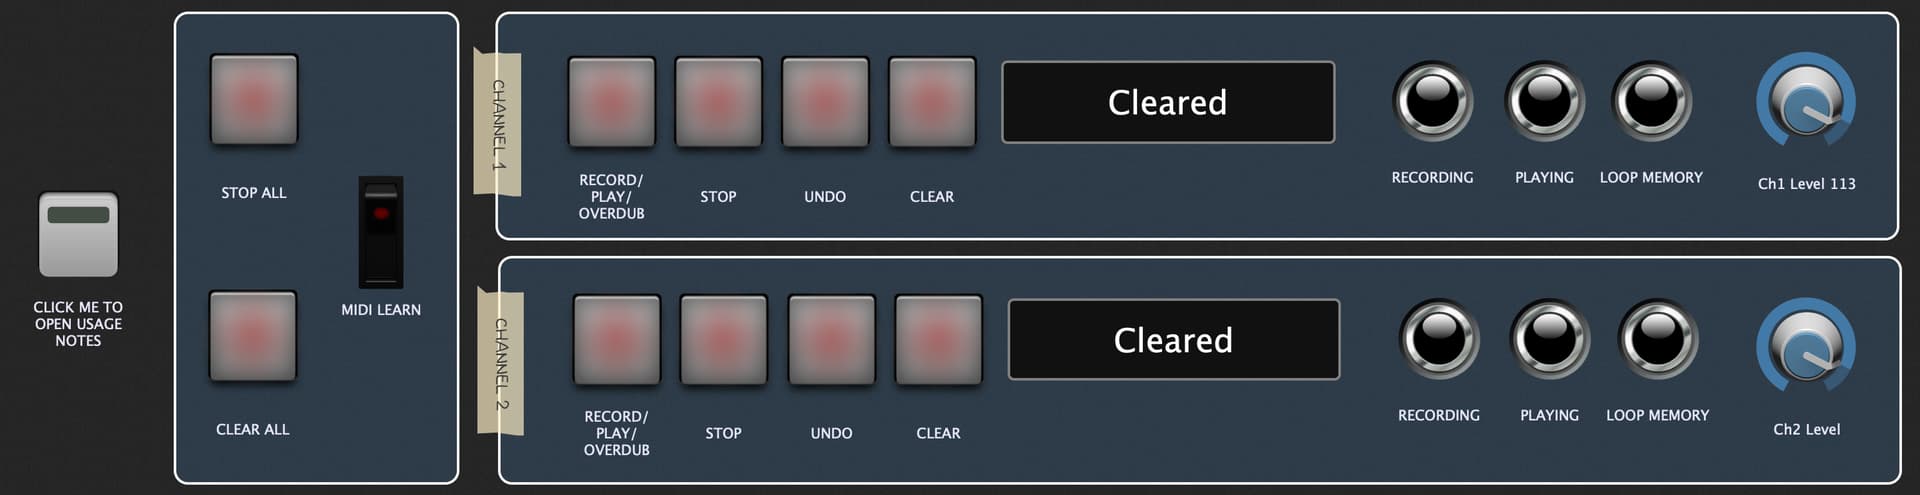
Any widgets (within reason) can be used for control; however the following are recommended:
- Add 4x momentary widgets for each looper channel you want to use and assign these to Record/Play/Overdub, Stop, Clear, and Undo of the scriptlet
- Add a label widget and assign it to the looper channel state
- Add 3x LEDs and assign them to Recording, Playing, and Memory for each channel
- Add a knob for each channel and assign to the level controls
- Add 2x momentary widgets for Global stop and clear
- Add a switch for MIDI learn mode
Easiest is to use the rack-panel included with the scriptlet.
No GPscript naming is required and the widgets can be assigned to any MIDI command and/or grouped as you wish.
Usage Note:
The key thing to note is to ONLY control the looper using the widgets (and any MIDI device attached to them) and NOT to use the controls within the TH-U plugin window - there is no direct synchronisation and performing an operation directly in TH-U will get the widgets out of sync with what is actually happening. If this happens - simply use the WIDGETS and click CLEAR ALL. This will reset both TH-U and the scriptlet to the same state
Count-In/Metronome/Quantize/Save
Sadly these options are not exposed to MIDI so you can only set them using the TH-U interface.
MIDI Learn:
Before use you will need to learn TH-U to the MIDI that is sent from the scriptlet.
A MIDI learn mode is provided that disables the state machine in the scriptlet and just sends out the MIDI. Set this to active and then learn each of the momentary buttons to their respective commands in TH-U. Also do this for the level knobs (if using)
You don’t need to do anything with the label (looper state) and led (recording, playing, memory status) widgets.
Using:
To use, simply press the buttons - or activate the midi control attached to the widget - as you wish with any normal looper.
From the “Cleared” state, the main button to press is “Record/Play/Overdub”. Pressing this successively runs through the states:
Cleared → Recording → Overdubbing → Playing → Overdubbing → Playing
Press stop to stop recording/dubbing/playing but keeping the recorded loop in memory. You can then press Record/Play/Dub again to start playing; successive presses will toggle overdub/play until stopped.
Undo will clear the last dub on the respective channel.
Clear will clear all recordings for the channel.
If one channel is overdubbing and you select overdub on the other channel, the first will automatically switch to play.
If one channel is “Recording” (first record after a clear) then pressing Record/Play/Overdub on the other channel will set that channel to “Play” and not Record or Overdub.
Pressing Stop All will stop both tracks but keep all loops in memory.
Pressing Clear All will clear the loops of both tracks. Pressing this whilst tracks are playing/recording/dubbing will instantly stop all tracks and clear the memory.