Looking to add a couple more foot switches to my live setup…
Any chance I can use a straight USB-type “transcription” pedal? There’s a nice 3 -switch one for sale used, it has very nice ergonomics. It’s made for controlling a transcribing recorder. Model is the Executive Communications Sustems Infinity 3 USB foot controller.
@Lou I tried some time ago to use this type of footswitch as a controller but it never worked.
The manufacturer explained me that it will only work with transcription software.
If you’re looking for a practical and cheap midi controller, there is for example the Line6 FBV Express MK2 which has 4 footswitches + 1 dual function expression pedal.
I use one of them live to control GP without any problem.
I build my own using Arduinos. They are cheap, easy to program, recognized as a MIDI controller (so plug and play) and with a decent number of digital and analog inputs can support a lot of switches or expression pedals.
Thanks all, great answers and info. Yes thinking it thru further I realized of course that the ‘transcription controller’ USB pedal will be sending a proprietary signal which it’s own app would recognize, but unless that app has the ability to output a Midi event (which it wouldn’t) it won’t work.
I do like the layout of that transcription pedal but the only way to make it work would be to hack it, wire the button closures directly as contact closures to another Midi Expression convertor. I might go that route. The other suggestions here are all worth exploring as well. The Arduinos approach is pretty cool, completely customizable.
Thanks all again.
Do you have some Arduino code to share with us? I don’t think that Arduinos are recognized as a MIDI device by default, but with the right code it can do wonders as you say.
For easily building USB MIDI devices, I can recommend the (Arduino-compatible) Teensy with the excellent MIDIController library. I’ve been using it for a while with a little purpose-built controller box.
You’ll find my code for it here: gigbox v0.2 · GitHub
It’s basically one of the examples with a custom debounce function for the sustain pedal.
Oh yeah, the included examples are great!
This is excellent information! Thanks so much. I’ve just downloaded Arduino tutorials, going to dive in and start learning it. I’ve looked thru the libraries you reference and this looks exactly what I need. Got the Teensy on order.
Looking forward to seeing what you’re going to build
One more hint about the Teensy: To program it using Arduino, you need to use their Teensyduino fork. In case of any other questions, just post them here
#include <Control_Surface.h> // Include the Control Surface library

constexpr uint8_t MCC_USER_14 = 0x0E;
constexpr uint8_t MCC_USER_15 = 0x0F;
constexpr uint8_t MCC_USER_16 = 0x10;

// Instantiate a MIDI over USB interface.
USBMIDI_Interface midi;

// Instantiate a CCPotentiometer object
CCPotentiometer potentiometer = {
  A0,                                   // Analog pin connected to potentiometer
  {MIDI_CC::Channel_Volume, CHANNEL_1}, // Channel volume of channel 1
};

// Instantiate a CCButton object
CCButton button16 = {
  // Push button on pin 4:
  4,
  // General Purpose Controller #1 on MIDI channel 1:
  {MCC_USER_16, CHANNEL_1},
};

// Instantiate a CCButton object
CCButton button14 = {
  // Push button on pin 5:
  5,
  // General Purpose Controller #1 on MIDI channel 1:
  {MCC_USER_14, CHANNEL_1},
};

 // Instantiate a CCButton object
CCButton button15 = {
  // Push button on pin 6:
  6,
  // General Purpose Controller #1 on MIDI channel 1:
  {MCC_USER_15, CHANNEL_1},
};

void setup() {
  button14.invert();
  button15.invert();
  Control_Surface.begin(); // Initialize Control Surface

}

void loop() {
  Control_Surface.loop(); // Update the Control Surface
}
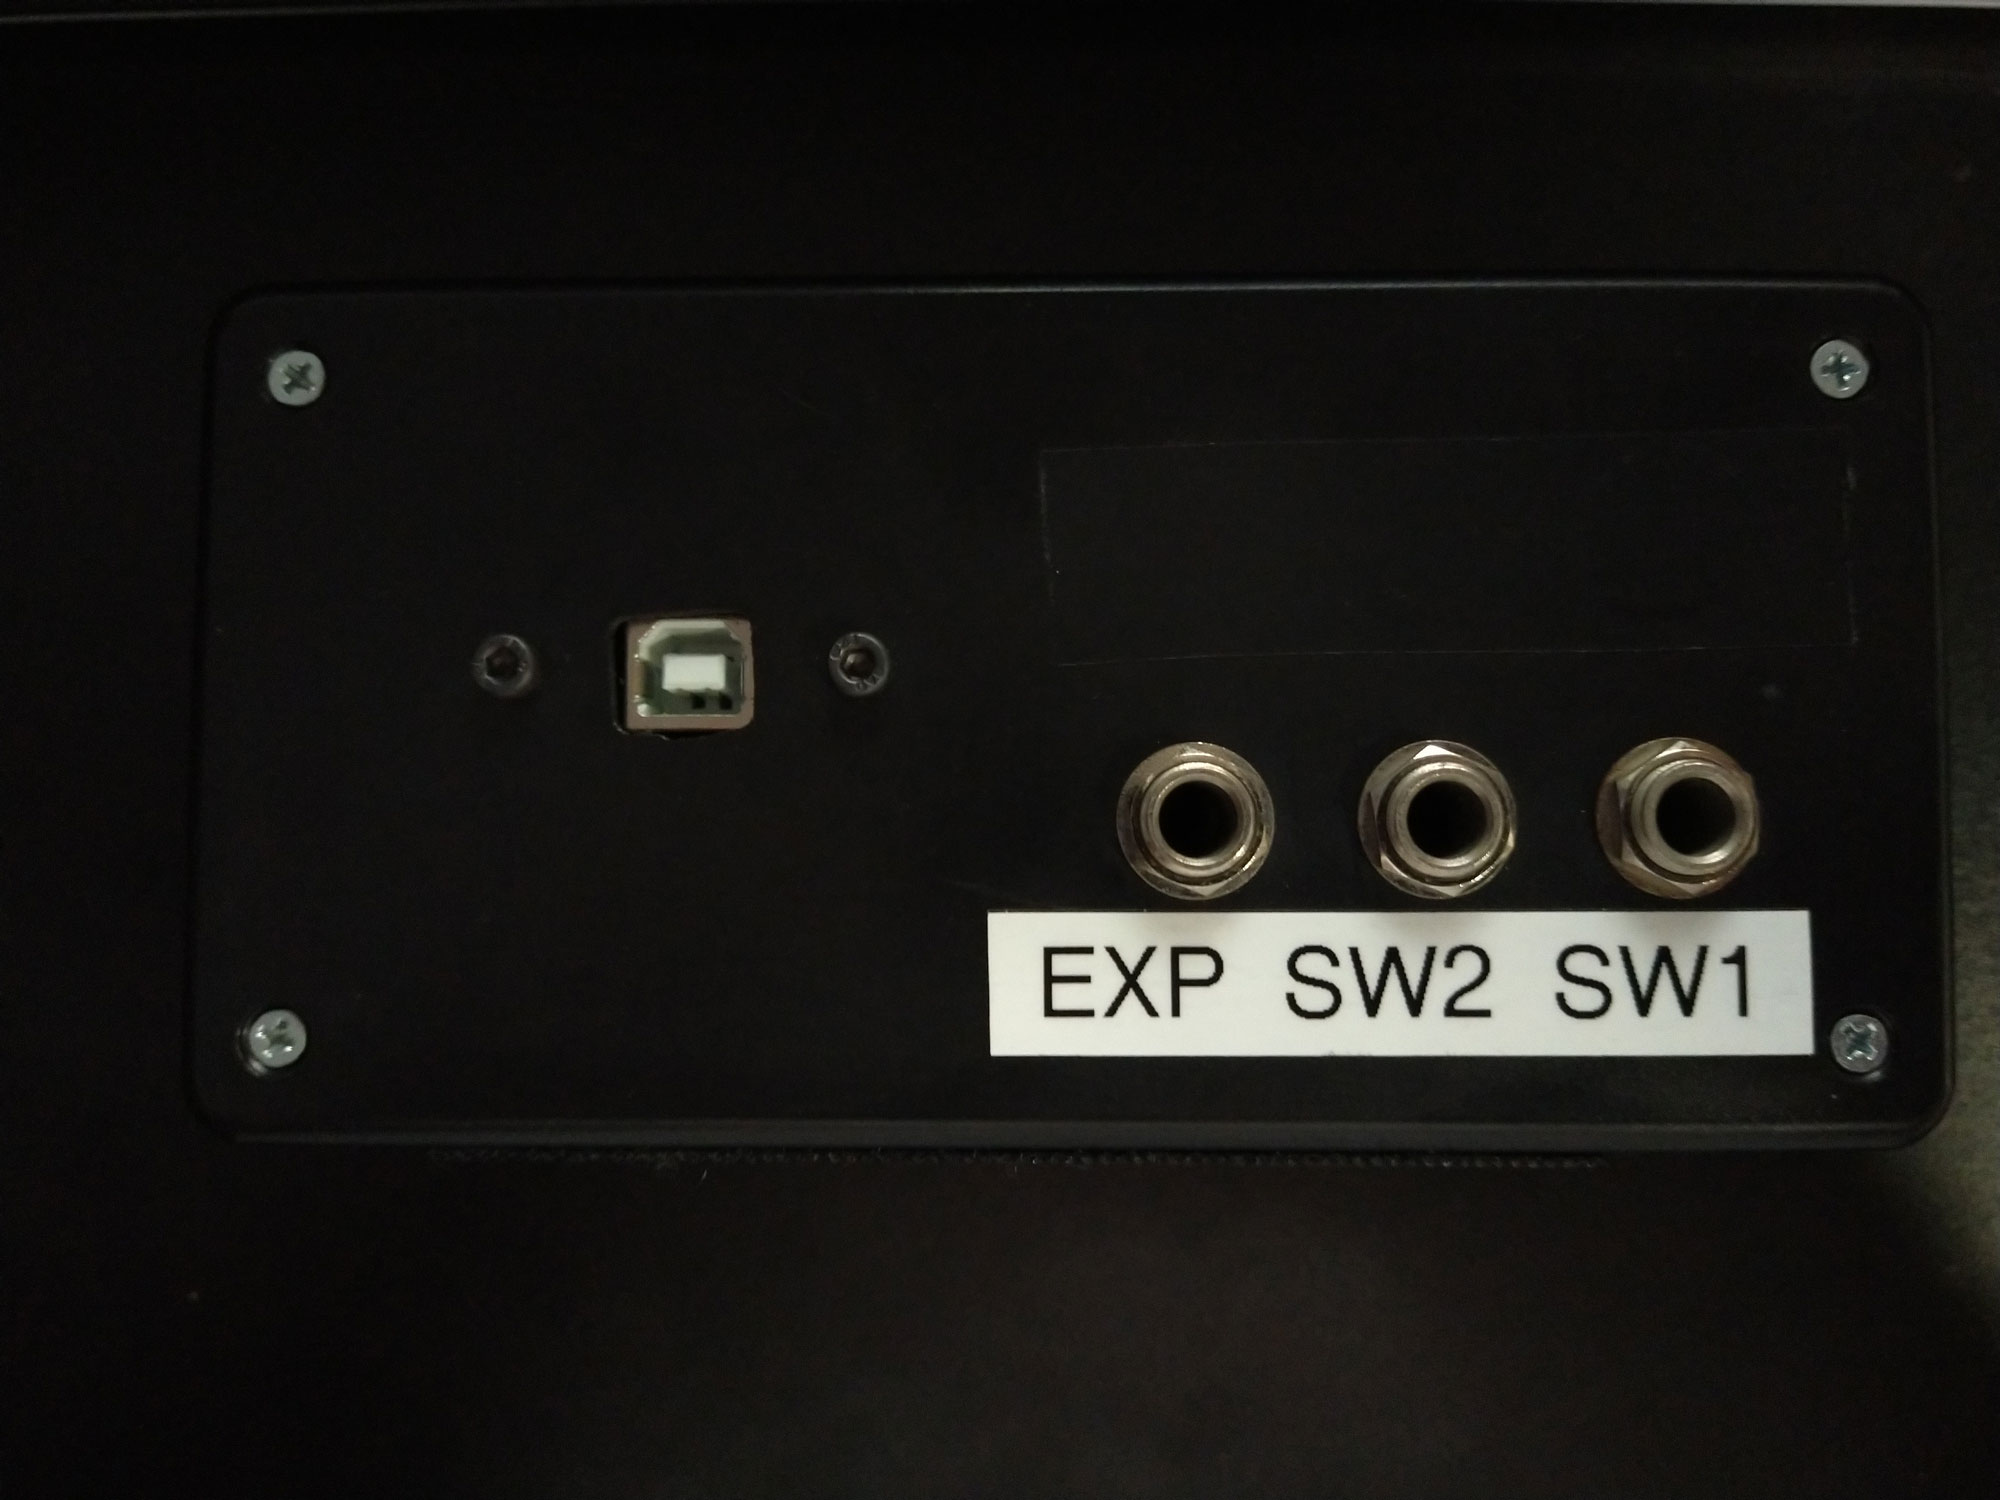
The box I pictured above uses 49 lines of code (including white space and comments). I define a Potentiometer control which is a standard expression/volume pedal, and three switches. SW1 is a simple momentary/sustain type pedal, and SW2 is a guitar 2-switch box with a TRS connector.
Even for non-coder I think it’s pretty easy to follow.