Hello,
I would like to create a button for remote control of the streaming audio file player. The button should change its background color at start/stop. Who can help?
You cannot change the background color of the Streaming Audio File Player (if that’s what you meant?).
You could set up a label/shape widget to change color, which you could resize to fill the entire panel.
He wants the color of the widget to be changed when pressed.
Now for example the green push button is fully green when pressed and lighter green when not pressed.
He wants different colors.
Yes ![]()
You could have a workaround by having a button overlayed by a shape widget, whose color can be changed via scripting.
The shape widget is “click transparent” so a mouse click will go through it to the underlying button.
But be aware that “start” and “stop” are two different parameters, so you’d need either two separate buttons, or you’d have to control the start/stop behavior completely by GP Script.
And here we go ![]()
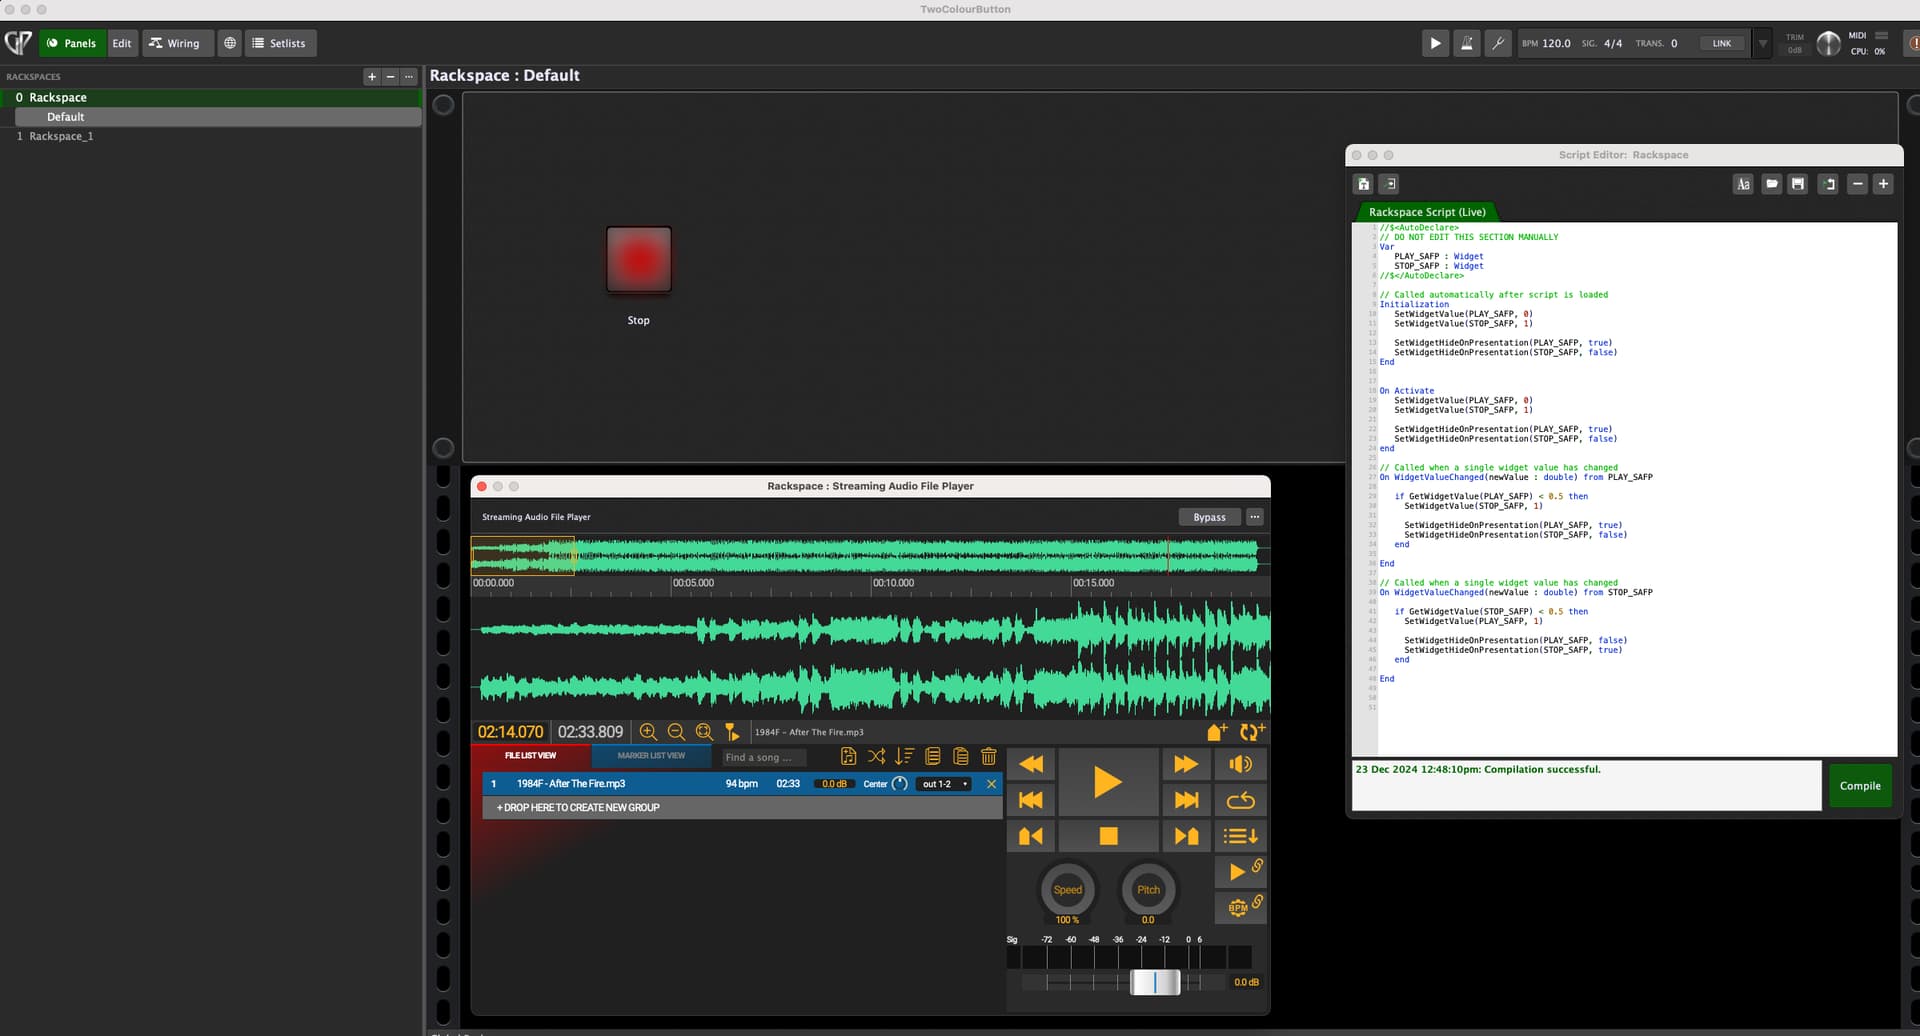
TwoColourButton.gig (52.1 KB)
Just a small example how to overlay and show/hide two buttons.
3 Likes
Danke
It works, what do I have to change so that I can create a button for “Loop” or “Auto Next Track”?
For every new dual color button you have to
- add two buttons (momentary) and provide handles
- map one of the buttons to the desired action
- Add the handles to the script
- Add initialization and on activate behavior
- Add a callback for each button and provide code like in the example for these
Depending on the following function you have to add on e more hidden button or scripting mechanism to control the function you have mapped.
This example was intended to get you the idea how to show/hide different style/color buttons.
You could also define some color shape labels like mentioned above. There are tons of possibilities. Just try - there’s nothing to damage ![]()
I have tried to change the script to the loop button. What is wrong?
TwoColourButton.gig (75.2 KB)
Well, you did not modify/add any code to the rackspace’s GP script as mentioned above?!
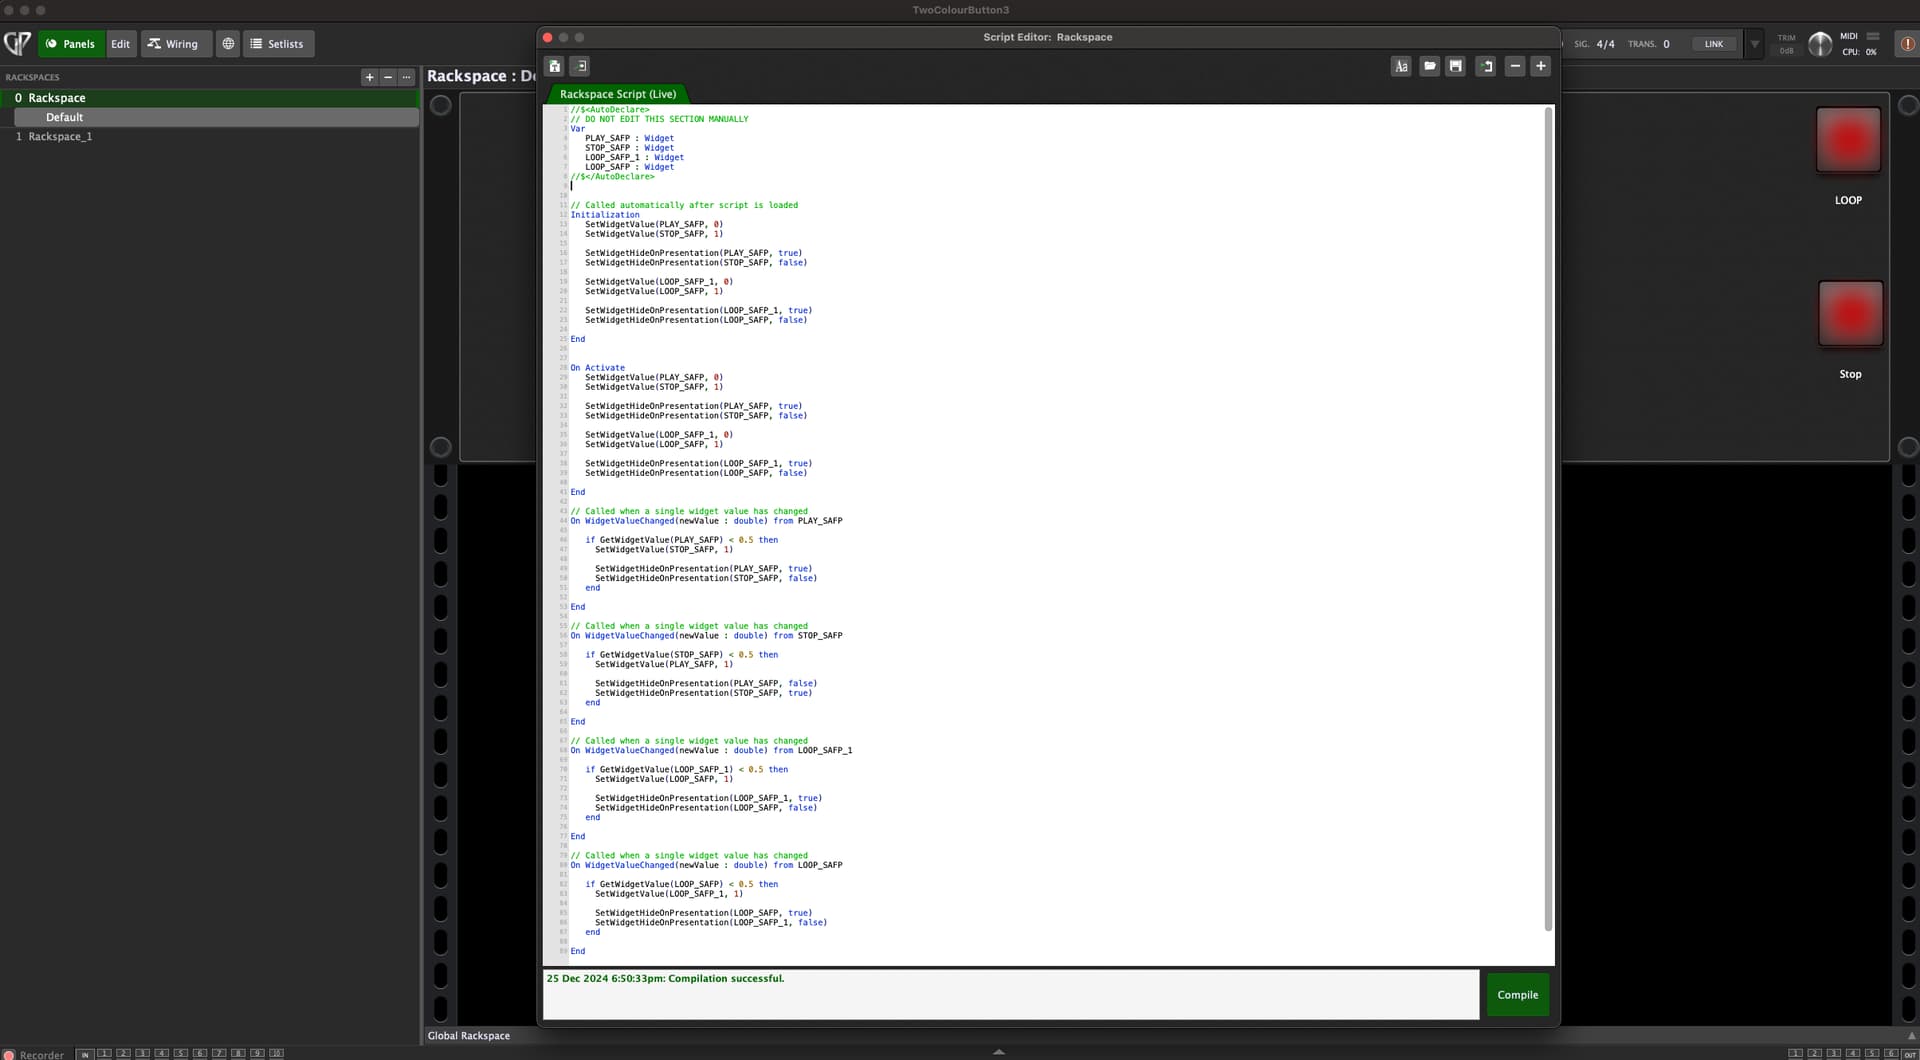
TwoColourButton3.gig (78.9 KB)
Loop works, thank you.
How do you do that? I copied your 1st script (Start/Stop) and created a new script with the “+” button at the top right. Then I pasted the text and changed it to “Loop” and then pressed “Copy”. Or do you have to paste it directly into the “Start/Stop” script?
Good! Yes, everything is in the „Current Rackspace Script“.
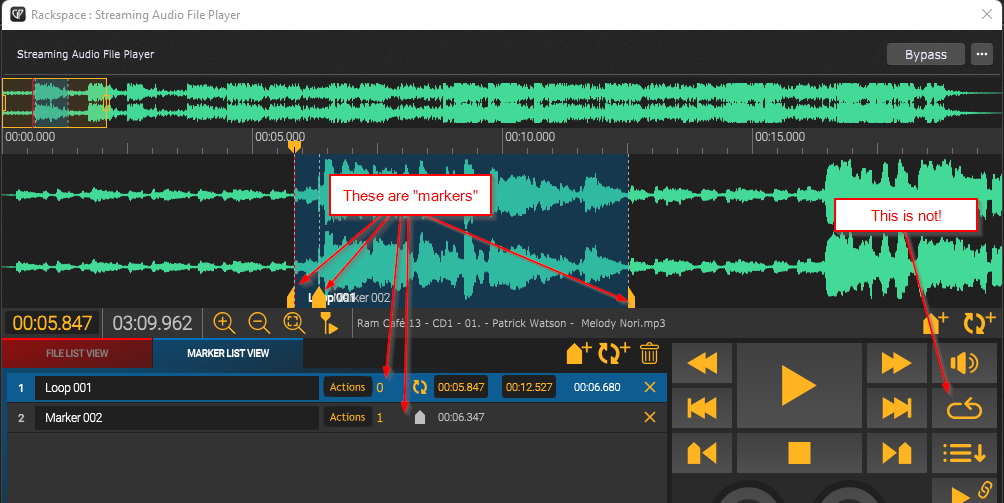
When starting/stopping, the panel button reacts automatically to the changes in the SAFP, but unfortunately the loop button does not. If, for example, the player goes into the loop on its own (via the maker), the panel button does not react…Is there a solution for this?
How do you set the SAFP to loop “on its own”? Which type of marker do you use for this?
Englisch
Starten muss man den Player selbst und man kann einen Marker setzen, welcher den Loop aktiviert. Vorher sollte man den Bereich für den Loop festlegen. Darum geht es aber nicht, bei meiner Frage…
You have to start the player yourself and you can set a marker that activates the loop. Before that, you should define the area for the loop. But that’s not what my question is about…
But it is what your statement is about…
a “marker” is a point on the timeline, i.e. the markers for start&ending point of a loop (=loop region/area) or “action markers”. The markers for a looping area are “markers” but they are not able to “set the player on loop by its own”. To set the player into “loop mode” you’d have to enable the loop function (or loop button, or loop option… whatever), but as far as i know, there is no “marker” available to do this, nor is there a marker “action” for this. That’s why i asked you, how you set the player to loop…
See… i don’t want to be nitpicking, but it’s important to tell things by their correct names, even more important when it comes to solving problems or describing issues.
Maybe i missed something important, maybe you mixed something up. Both might have happened.
I actually made a rackspace with a script that has widgets which also react on the player’s functions for START/STOP/LOOP, means the widgets also change their state when you use one of the functions from within the player’s GUI.
I only can guess that the behaviour of the LOOP button is what you called “a marker to set the player to loop”, but i’m not 100% sure and i just wanted to make sure that i wouldn’t have missed something when i give that gig file to you and it doesn’t work the way you want it to.
![]()
1 Like
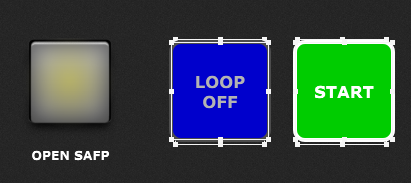
Ok… here is the promised gig file! ![]()
I used two LED buttons with just having a GP-Script handle but no connection to anything - they only serve as “receiver” for mouse clicks!
These buttons are then overlayed/covered by text-label widgets, which don’t react on mouse clicks themselves but let the clicks go through to the underlying buttons.
The benefit of these label widgets is, that they can be changed in their color settings (separated for font, fill, border), which cannot be done with button widgets of any type.
So, there is now a combination of a real button just for getting the click and then a cover label just for the optics!
I kept the labels placed below the buttons, so one can better see what’s going on.
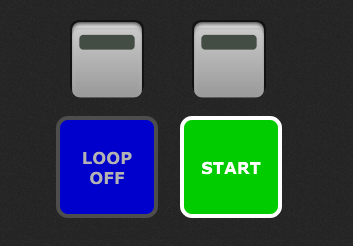
If you are ready to use the rackspace, just move the labels over the buttons, so that those are completely covered by the labels!
The functionality for controlling the SAFP is done completely via GP-Script - there is no “visible” assignment between widgets to the SAFP-plugin!
The controls are pretty straight forward:
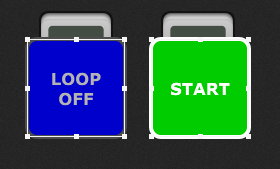
- press “PLAY” to start the SAFP playing the track (the “button” will turn red and change to “STOP”)
- press “STOP” while playing to make the player stop and automatically clear the loop option (the PLAY/STOP button will then turn green and change to “PLAY”, an activated loop button will turn to “LOOP OFF”)
- press the LOOP button to switch the loop setting ON/OFF (the button will change its color and text accordingly)
- the widgets also will react to changes you do in the SAFP-GUI directly (PLAY/STOP/LOOP)
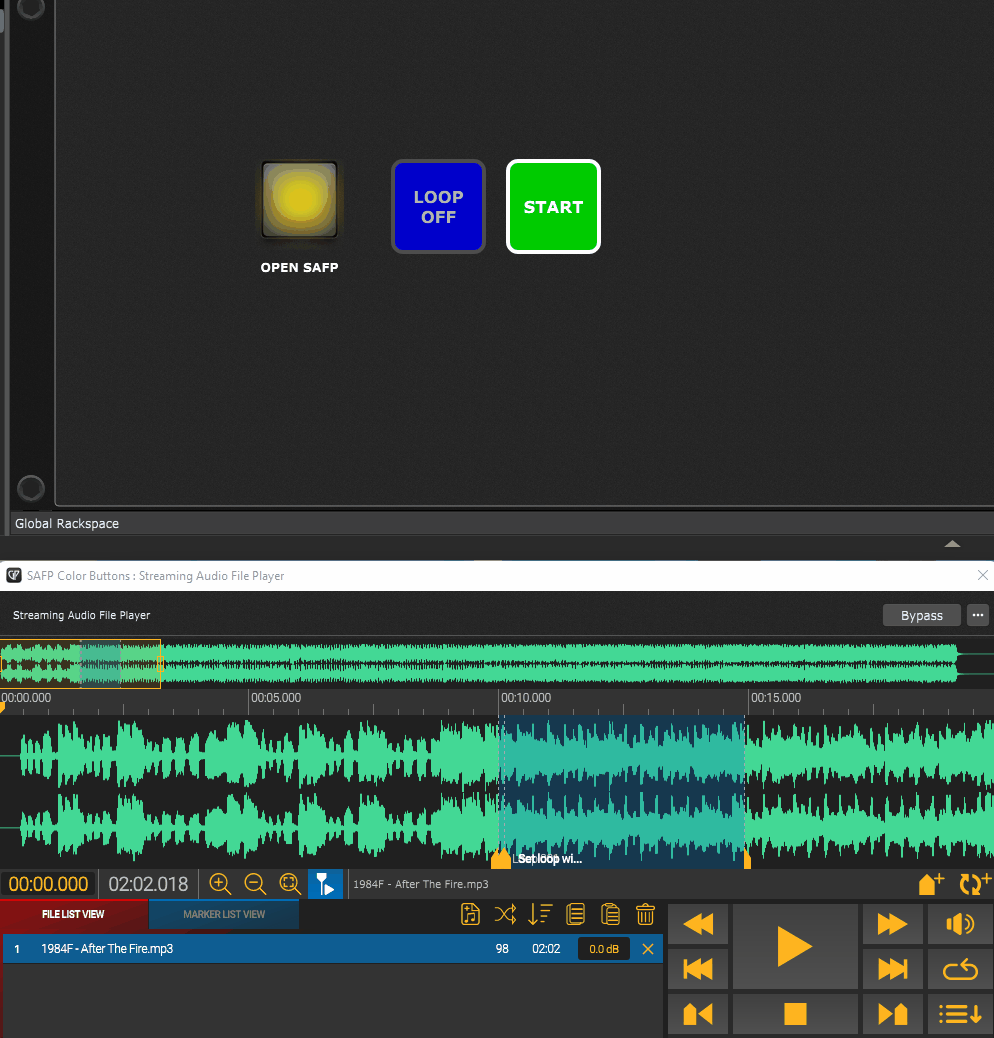
HINT: If you want to make the SAFP run into a marked loop section and then automatically activate the “LOOP” option itself, place an action marker right after the loop section’s starting point and use the “Set widget value” action! Use the handle of the “loop” button widget (which in my rackspace is btnLoop) and set it to a value of 100). Then the playhead will run into the lopp section, looping is activated automatically and the section will be played until you manually switch the “LOOP” button off - then it will just play along until the end.
This is the gig file:
SAFP-Color-Buttons.gig (80.5 KB)
and this is the script working behind the curtains:
var
//color definitions
red : integer = RGBToColor(0.8, 0.0, 0.0, 1.0)
green : integer = RGBToColor(0.0, 0.8, 0.0, 1.0)
blue : integer = RGBToColor(0.0, 0.0, 0.8, 1.0)
lightblue : integer = RGBToColor(0.2, 0.4, 1.0, 1.0)
white : integer = RGBToColor(1.0, 1.0, 1.0, 1.0)
black : integer = RGBToColor(0.0, 0.0, 0.0, 1.0)
darkgrey : integer = RGBToColor(0.3, 0.3, 0.3, 1.0)
lightgrey : integer = RGBToColor(0.7, 0.7, 0.7, 1.0)

//widget variable definitions
btnStartStop, btnLoop : widget
txtCoverLoop, txtCoverStartStop : widget

//plugin block variables
SAFP1 : PluginBlock


//user function to set text-label colors
function colorMe (wdgt : widget, fontCol: integer, fillCol : Integer, borderCol : Integer)
    SetLabelColor(wdgt, fontCol)
    SetWidgetFillColor(wdgt, fillCol)
    SetWidgetOutlineColor(wdgt, borderCol)
end

//called on first loading and on compilation
Initialization
    SetWidgetValue (btnStartStop, 0.0) //Set to STOP
    SetWidgetValue (btnLoop, 0.0) //Set to LOOP OFF
End

// Called when rackspace is activated
On Activate
    SetWidgetValue (btnStartStop, 0.0) //Set to STOP
    SetWidgetValue (btnLoop, 0.0) //Set to LOOP OFF
End

//widget handling for LOOP
On WidgetValueChanged (bVal : double) from btnLoop
    if bVal==1.0 then
        //widget cosmetics
        colorMe(txtCoverLoop, white, lightblue, white)//set label colors
        SetWidgetLabel(txtCoverLoop, "LOOP[nl]ON")//set label text
        //SAFP-control
        SetParameter(SAFP1, 1, 1.0)//SAFP-Loop ON4
    else
        //widget cosmetics
        colorMe(txtCoverLoop, lightgrey, blue, darkgrey)//set label colors
        SetWidgetLabel(txtCoverLoop, "LOOP[nl]OFF")//set label text
        //SAFP-control
        SetParameter(SAFP1, 1, 0)//SAFP-Loop OFF
    end
End

//widget handling for START-STOP
On WidgetValueChanged (bVal : double) from btnStartStop
    if bVal==1.0 then
        //widget cosmetics
        colorMe(txtCoverStartStop, white, red, white)//set label colors
        SetWidgetLabel(txtCoverStartStop, "STOP")//set label text
        //SAFP control
        SetParameter(SAFP1, 3, 1.0)//SAFP-PLAY ON
        SetParameter(SAFP1, 22, 0.0)//SAFP-STOP OFF
    else
        //widget cosmetics
        colorMe(txtCoverStartStop, white, green, white)//set label colors
        SetWidgetLabel(txtCoverStartStop, "START")//set label text
        //SAFP control
        SetParameter(SAFP1, 3, 0.0)//SAFP-PLAY OFF
        SetParameter(SAFP1, 22, 1.0)//SAFP-STOP ON
        SetParameter(SAFP1, 1, 0)//SAFP-Loop OFF (comment out if you don't want LOOP to be switched OFF automatically)
    end
End

// Called when a plugin block parameter value has changed
// Handling for changes coming from the SAFP GUI
On ParameterValueChanged(parameterNumber : integer, parameterValue : double) from SAFP1
    if parameterNumber==3 and parameterValue==0 then//SAFP "Play" OFF
        SetWidgetValue (btnStartStop,0)
    end
    if parameterNumber==3 and parameterValue==1.0 then//SAFP "Play" ON
        SetWidgetValue (btnStartStop,1)
    end
    if parameterNumber==1 and parameterValue==0 then//SAFP "Loop" ON
        SetWidgetValue (btnLoop,0)
    end
    if parameterNumber==1 and parameterValue==1.0 then//SAFP "Loop" OFF
        SetWidgetValue (btnLoop,1)
    end
End
Hope this is what you asked for… ![]()
4 Likes