Gig performer handled it very well. But there were two main issues I had during setup that had me scrambling almost right up to downbeat.
First, the venue had a lighting rig that wasn’t properly grounded. I was using a USB hub/power supply to charge my laptop and pass the USB from the Keylabs into my Macbook. The noise in the electrical circuit was so bad, our bass players rig was humming like a transformer. So the noise in the electric was interfering with the USB. Once I pluged the keyboards into the laptop directly, all went well.
The second issue I had, is that the stage was one of those “rent a stage” affairs. When people start jumping around, the stage starts shaking and my laptop was rocking back and forth more than I liked.
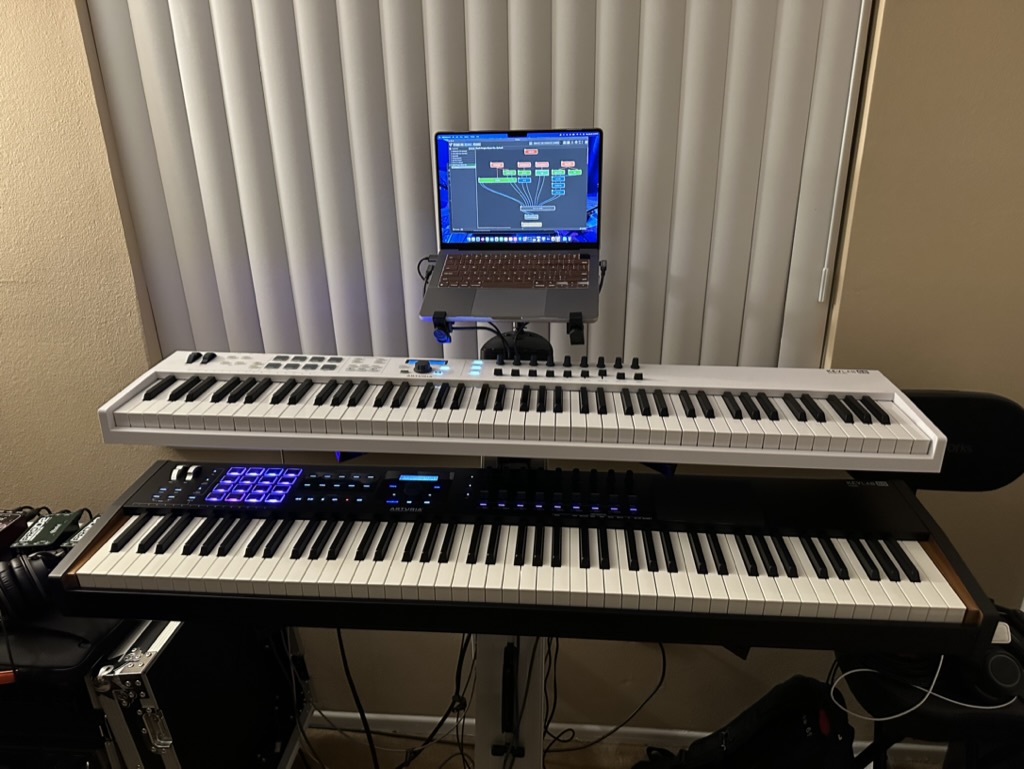
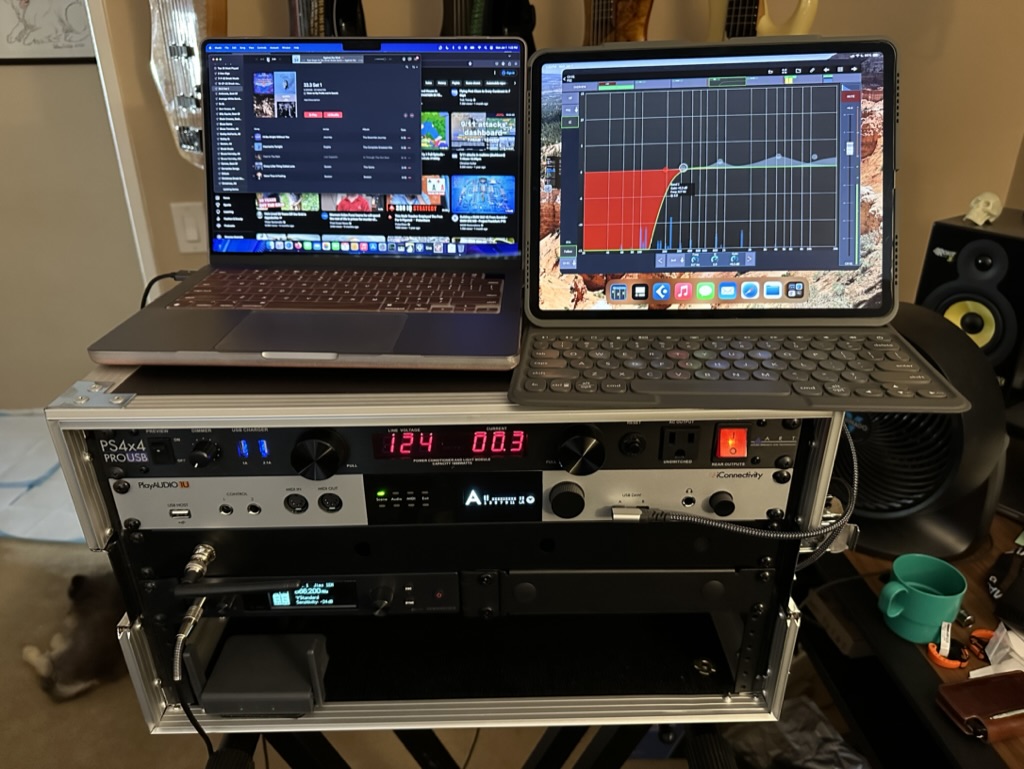
That got me thinking and I researched RTP Midi. Over the Holidays, I morphed my rig into this:
The keyboard rig I stand in front of looks the same, but I picked up an iConnectivity Mio which provides USB power and Midi to/from the Keylabs. The Mio is connected to this rack by CAT6a ethercon which can be up to 300 feet away and there is no perceptable latency. But that created a new challenge.
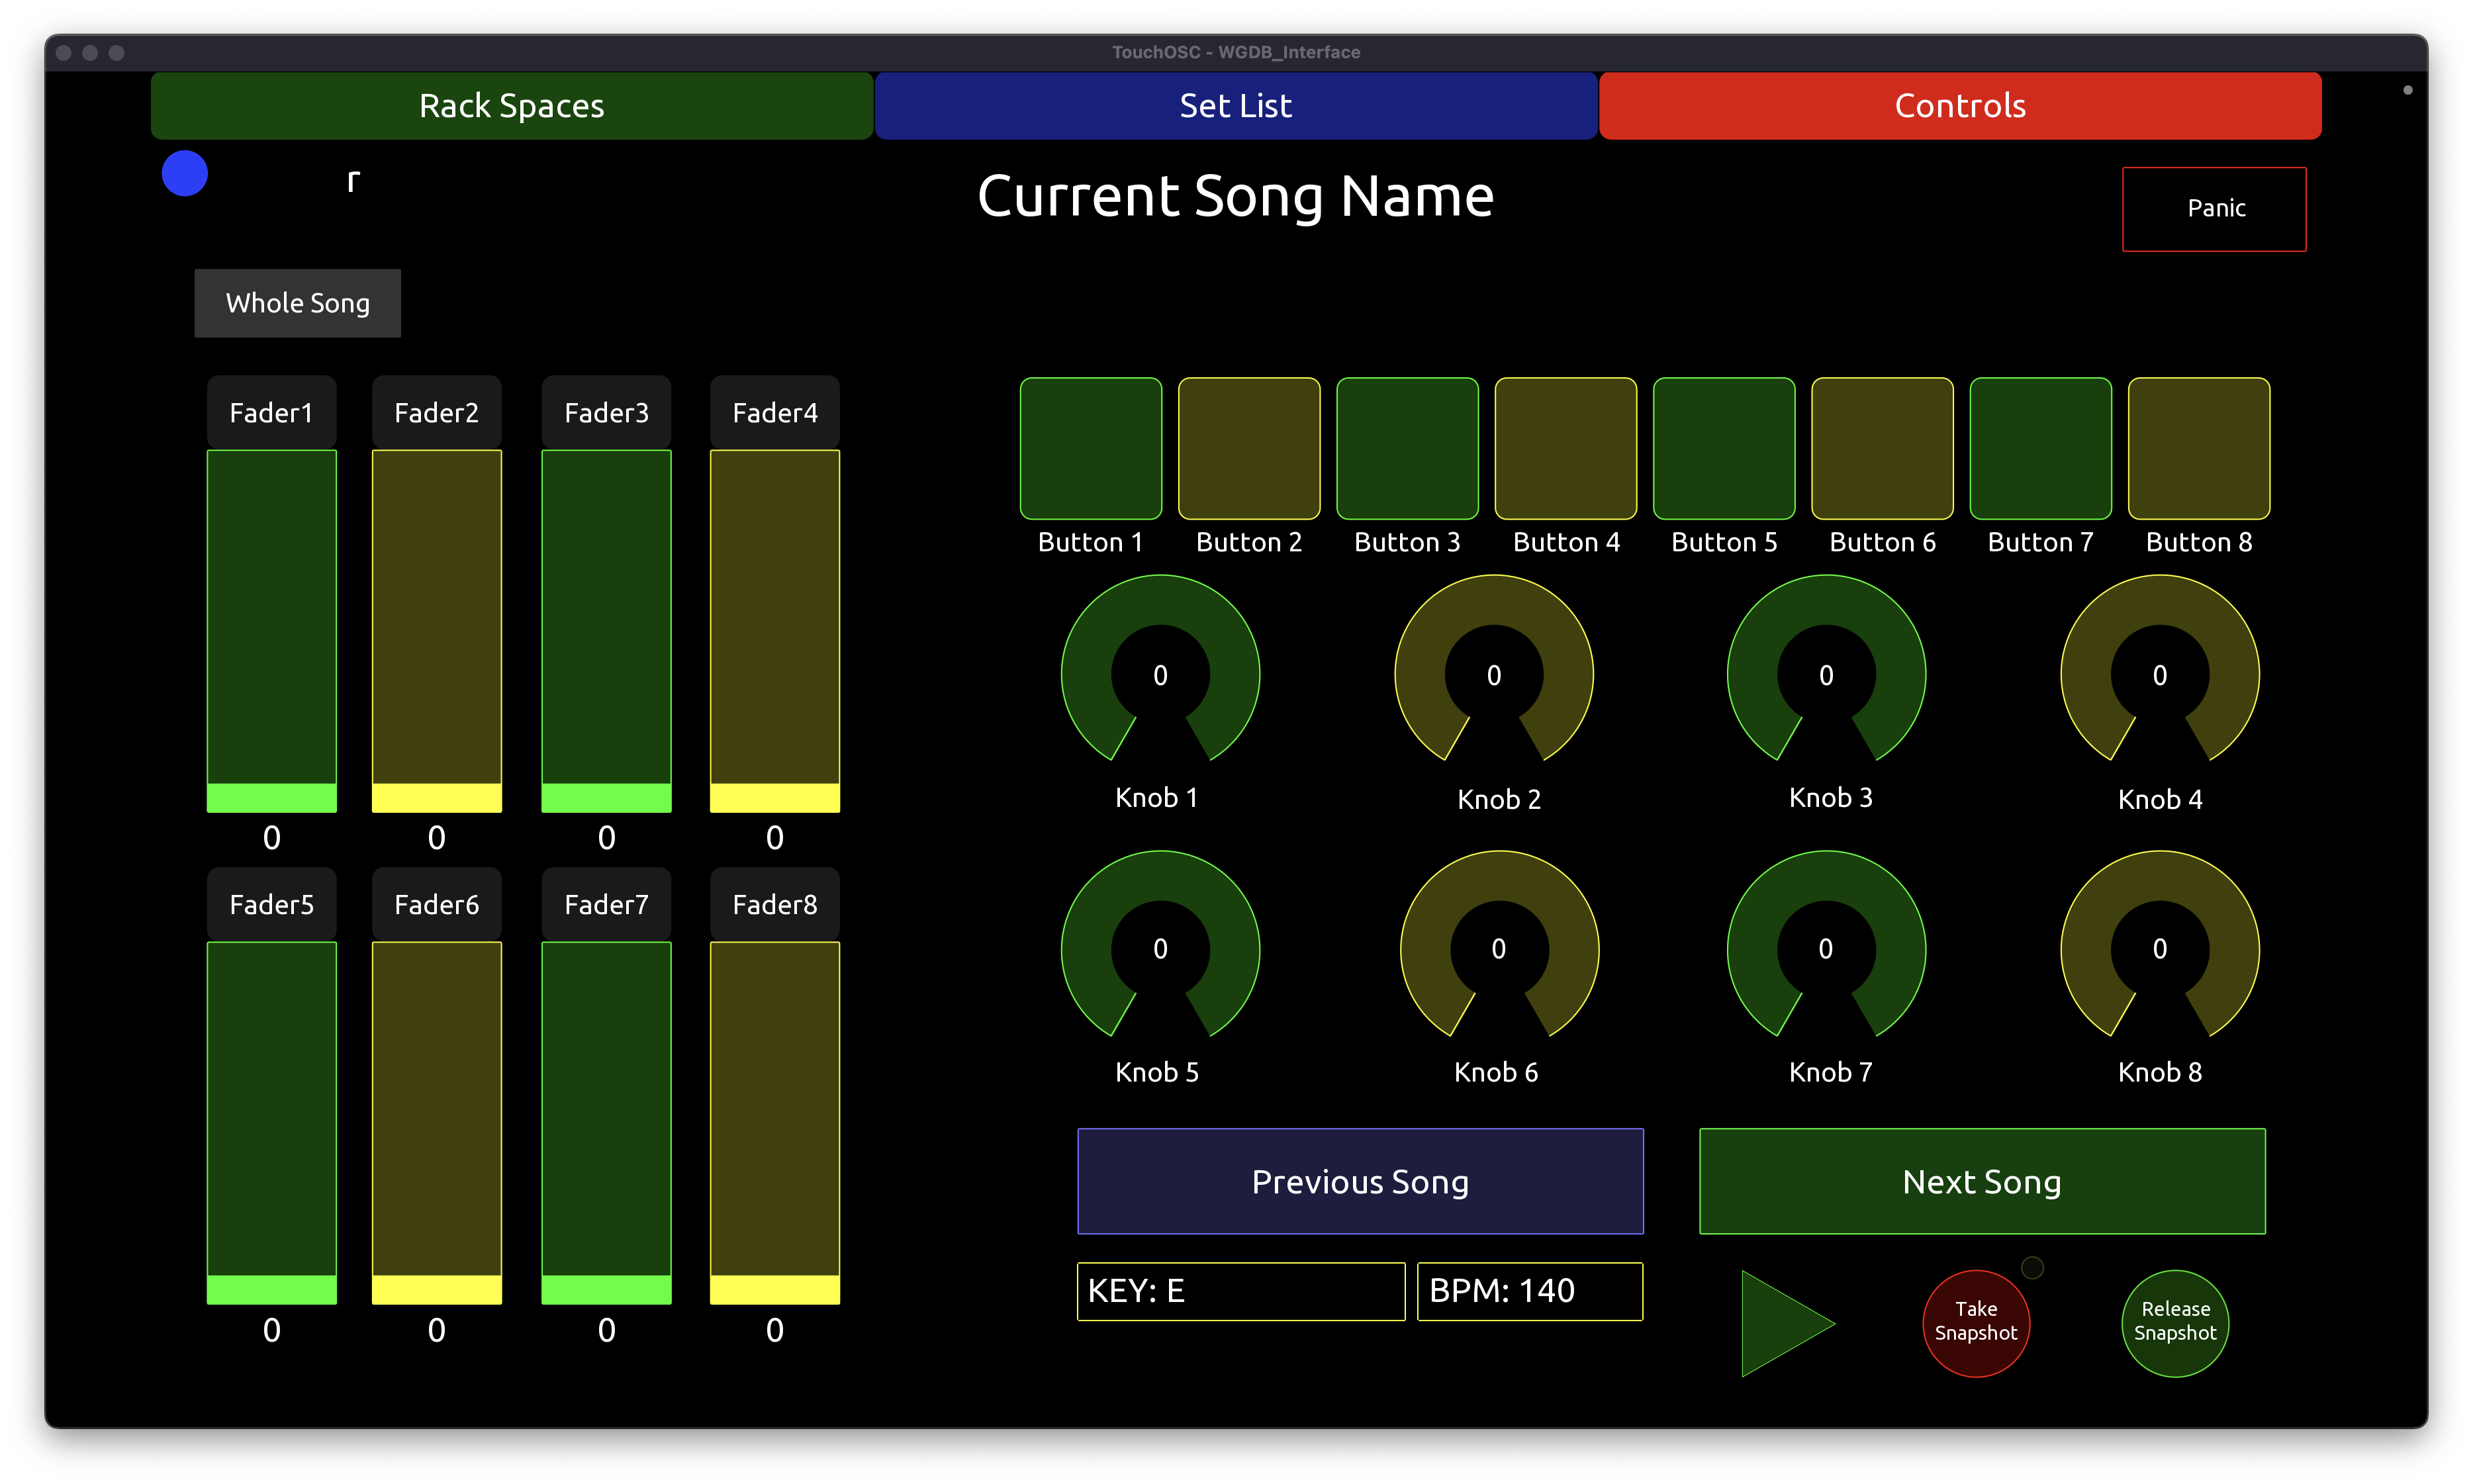
My laptop was now wherever this rack was which isn’t in front of me. To remedy this, I spent the holidays taking the TouchOSC template made by rank13 found in these forums and heavily modifying it to add RackSpace View to go along with the SetList view the original template came with. I also modified the control view to show 8 x knobs, 8 x buttons, 8 x faders. As with the original, the controls are shown or hidden for each rackspace depending on the controls defined for that rackspace. I’ve also added color coding to the controls so that I can assign colors based on which keyboard the control is associated with.
I’ve got a few more bugs to work out on the interface, but I used it for the first time at a rehearsal night before last and it worked well. Once I iron out the bugs, I’m happy to post it up here in the forums for anyone interested.
I don’t know if this would work for you but it reminds me about my setup.
My MacBook isn’t in front of me but all I did was use an iPad on the mic stand and Remotix software to mirror/remote control the MacBook. Now the audience doesn’t see my butt when turning around for the MacBook and I found that touching the iPad is quicker than shaking the mouse to see where the curser is. I can use all the software on my MacBook from the iPad.
I am curious about your experience with the PlayAUDIO1U. That seems like a very interesting interface, especially thanks to the combination of the advanced MIDI (RTP) and 10-channel balanced outs. It would be perfect for my setup.
What kind of (small) buffer settings can you use? Is it as stable as, say, an RME or Motu with buffer settings of 64 or less samples? I read somewhere about crackles when using multiple VSTs simultaneously at (too) low buffer settings, which of course is something we keyboard-players are actually looking for (not just playback of backing tracks). I am using a Mac, BTW.
I am running the PlayAudio1U at 256 samples at 48Khz without issue. I’m using a 2023 MacBook Pro 14" M2 Max with 32GB of RAM running Ventura. I have A Gig file that currently has about 35 Songs/Rackspaces in it with dozens of AUs and some of the most demanding songs can sometimes use 10-12 AUs with additional EFX and I’ve not had any problems with crackling, drop-outs or hung notes.
The config of the PlayAudio1U at first is a little quirky in terms of how you map the various RTP channels to Midi interfaces in OSX and then into GP, but once you understand it it’s really simple.
Building thie OSC interface is part of the journey of getting a two laptop redundant solution online, so I haven’t had the chance to test that out yet. One strange quirk of the PA1U is that if you have it connected to a rack power conditioner and turn power off at the conditioner but leave the power on on the PA1U, the next time you turn it on the PA1U stays off until you flip the switch. So it defaults to power off. I haven’t found a setting in the firmware to change the default to “last state”, but that’s a minor thing IMO.
Otherwise, love it! I have a Motu M4 as a backup and was using that before I got the iConnectivity. Sound quality, I notice no difference. The PA1U is built pretty rugged. RTP just works. Plug in a CAT5E or better and go. You can change the settings or route it through a network switch if you want, but I run mine direct between the PA1U and the MIO by my keyboards. I did put a patch panel on the back of my rack and added an ethercon port which then patches into the network jack of the PA1U and on the keyboard side I have an ethercon coupler because I wanted some relatively armored cable between my rack and keyboard and standard network cable usually isn’t armored like good quality ethercon cable is.
What I like most about all this is that I have only 1 cable runing from my rack to my keyboards and teardown at the end of the night is much quicker. Everything in the rack is self-contained…
The total latency that I’ve seen with all this is 5.3ms for GP at 256 samples at 48Khz and probably a couple of nanoseconds of transmission and processing to send the network signal down the cable. Way under perceptible limits.
Yeah I thought about going this route at first but I had a few reasons for doing the Touch OSC thing.
If I’m on one of those rent a stage’s and my ipad is bouncing around a bit, sometimes those tap targets on the screen are hard to hit when my laptop screen is reduced to a 12.9" iPad screen.
I ultimately want to send OSC to two different laptops running in redundant parallel and Remote desktop apps are usually only allowed to connect to one device at a time, whereas I can send OSC to multiple devices simultaneously.
Most of my tweaking and patch changing is done with the buttons and knobs on my Keylabs, so the interface is as much a visual confirmation of my setup at the moment, but I can make changes to parameters I’ve mapped as needed on the iPad and the targets are bigger and easier to hit in less than ideal conditions.
I’m using the MIO XM because it’s relatively small and sits on the laptop tray that comes with my Keylab 88. They make the MIO XL as well which is a rack mount, but I’m trying to limit the amount of gear I have in front of me for a cleaner look. As with all these little boxes though, the Mio has a bit of an ugly wall wart power supply, but I can’t do anything about that. I may try to look for something more discreet that has the same amperage/voltage rating but for now it’s not a deal breaker for me.