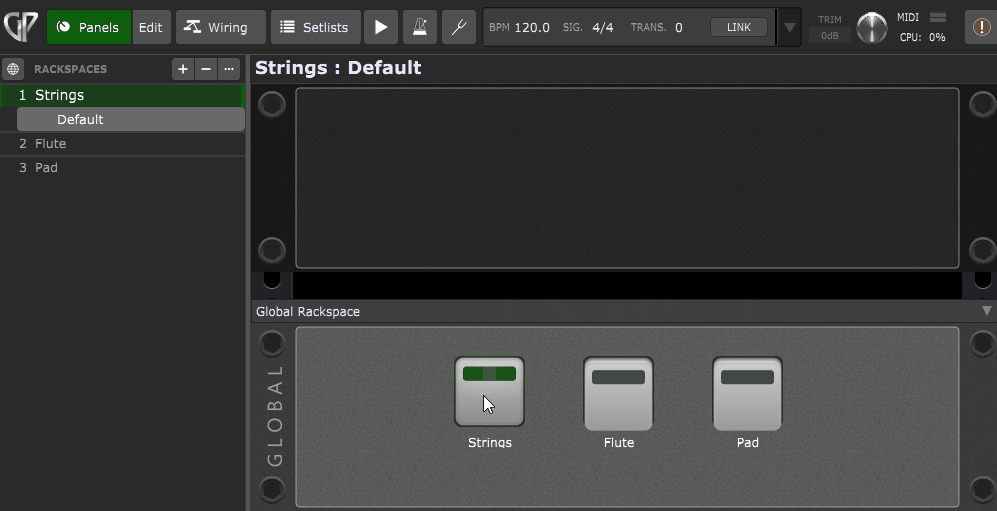
I downloaded the project and i see its working, but the scaled value is not set as 0, 1 and 2.
So am confused about what is the key thing which switches the rackspace when the widgets are pressed?
I understand the scale part, 0-100(widget value) is converted to Scaled value (0-127).
But the confusion is what is the 3 widgets supposed to output (when pressed) on it so as to get the correct Rack selected. Should the value be set inside Widget Value or Scaled Value ?
String: 0 (widget value) or 0.27 (scaled value)
Flute: 1 (widget value) or 1.27 (scaled value)
Pad: 2 (widget value) or 2.54 (scaled value)
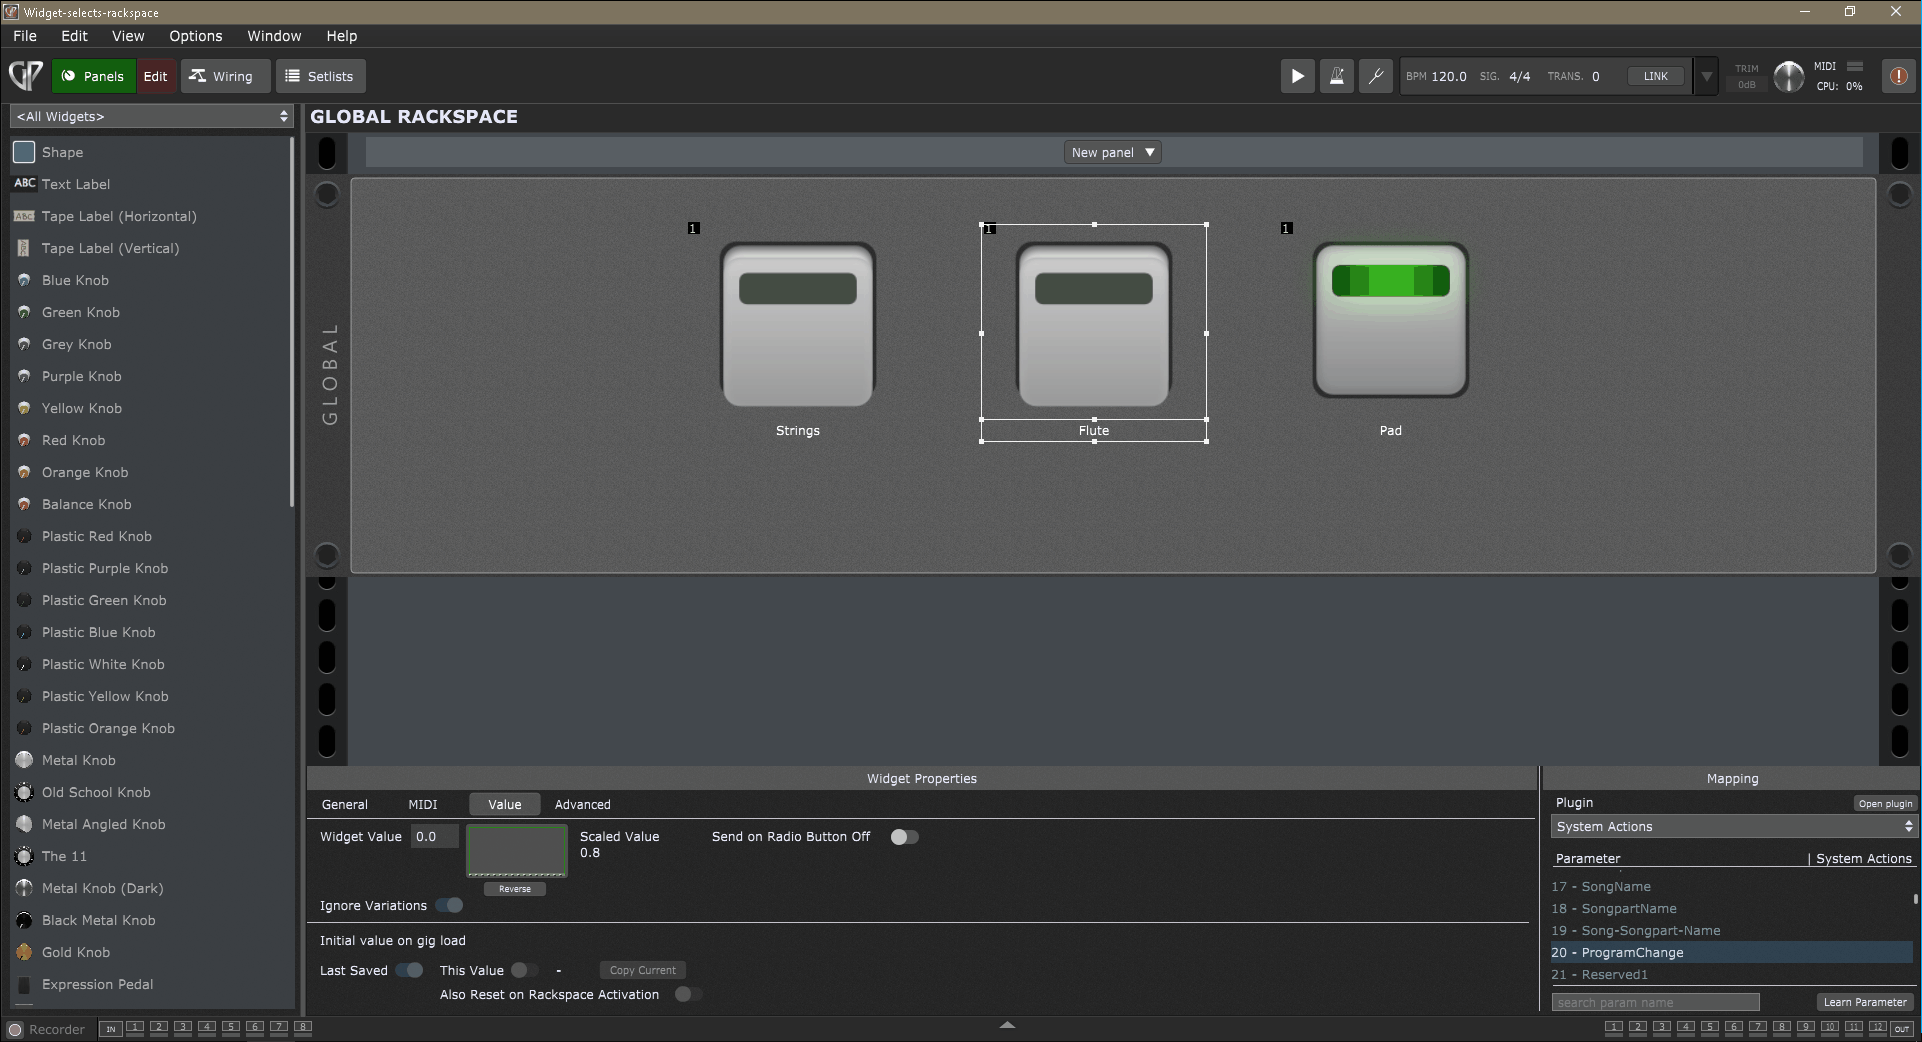
I haven’t found a way on how to set correctly values into the Scaled Value curve, can you make a gif picture and attach and show us how to set Scaled value correctly?
As per your suggestion we need to set values 0, 1m, 2m in the Scaled Value.
In Scaled Value curve popup there is Min and Max textboxes, where should the value be set?
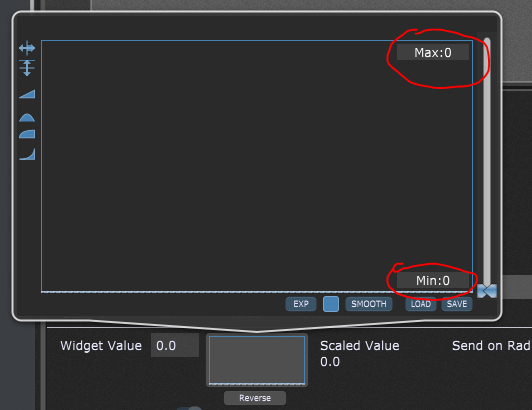
I figured it out.
I had to enter 0m, 1m and 2m in the min and max fields on the Scaled Value popup.
For anyone who gets confused and come here let this be a help: 1st Rack is String so min and max will be 0m 2nd Rack is Flute so min and max will be 1m 3rd Rack is Pad so min and max will be 2m
You can also directly enter values using MIDI numbers, by adding the letter “m” at the end of the value. For example, if you type in “64m”, Gig Performer will interpret it as an exact value of 50.39 (roughly 50% of the maximum MIDI value of 127).
To make it easy for users, will it be good to have only one textbox to enter the scaled value instead of opening the scaled value popup and entering it in the min and max textbox?
For advanced users this popup and 2 textboxes (min and max) will make some sense.
That’s not a bad idea - that said, the need for this particular feature (using a widget to jump to a specific rackspace) will go away soon as an upcoming version of GP will have the ability to map a MIDI message directly to a rackspace (or a song part)
Standard latching LED widgets (rather than momentary pads) may be a better solution as you can easily see from the widgets which of the rackspaces is active.
(I’d also reverse the variation buttons, so that ‘previous’ is the first button)
–
Who likes the scripting approach to change rackspaces with CC messages → LINK
Tried it and it works like a blast. I decided also to try to sync the lights of the NanoKontrol with the led on the panels. In this way I can know which variation I have active at a glance on the Kontrol. This also works great although not sure Im doing it correctly but I found a combination of edits that worked.
I currently don’t know to use song mode as yet but I believe I have no need for it at the moment as using simple variations is powerful enough for me.
This software never cease to amaze me when it comes to its potential and I feel like I have a new toy every time I interact with it.
I know it has been said in the forum before that you don’t have to go after the latest and greatest computer to run gig performer but I think it’s an addiction I just have to deal with. I sold my M1 Pro max and was without a computer for a while.
I was only using hard ware while I wait for m4 to arrive, still waiting actually, but go a loaner map for the time being so getting back into gp world again.
Thanks again for the quick help… Im almost completely ready for the wedding Im preparing for…