How to send audio from Gig Performer to Studio One
In Gig Performer, insert a GP Relayer Block in the Wiring view and connect your audio source (e.g. an instrument as shown in the screenshot) to the audio inputs of the GP Relayer Block.
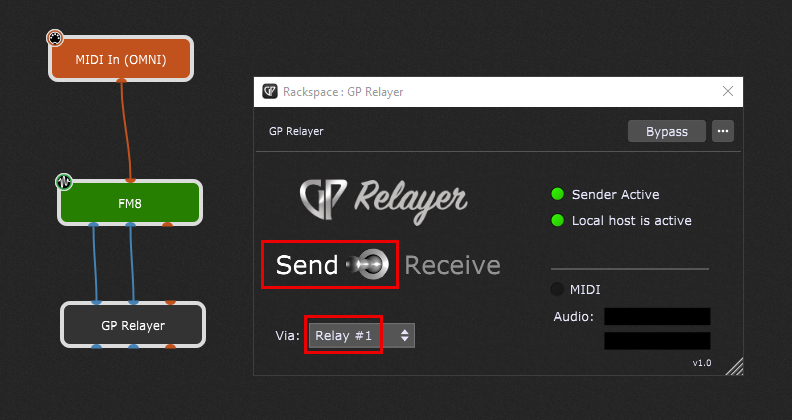
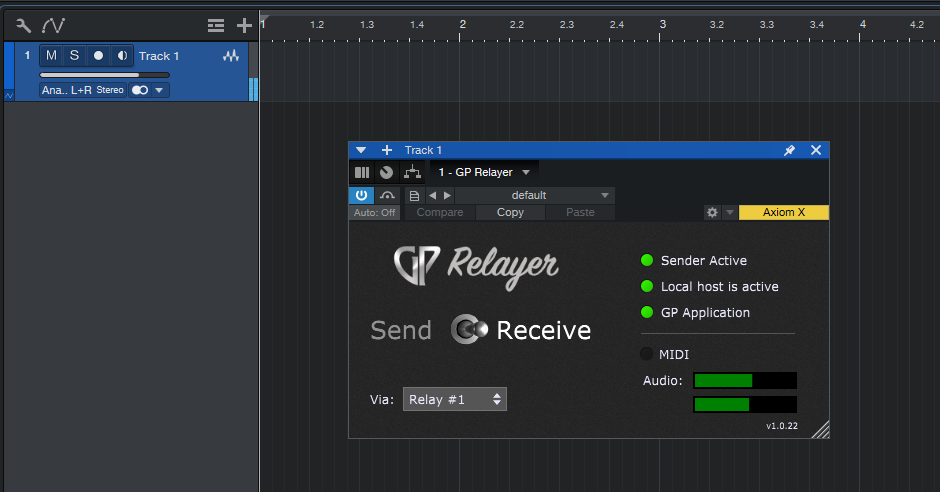
In the GP Relayer window, make sure that Send is selected. In the Via section, select the desired Relay, for example Relay #1.
In Studio One, insert a new audio track. Then go to the Effects tab in the Studio One Browser and drag the GP Relayer plug-in onto the audio track. Alternatively, you can drag it into the audio channel’s insert slot in the mixer.

Double-click the GP Relayer plug-in in the insert slot (either in the mixer or in the inspector section for this audio track). Make sure the switch is set to Receive and that the Via setting is the same as the Relay set in Gig Performer.
Any audio that is sent to the GP Relayer Block in Gig Performer will now be received on the audio track in Studio One.
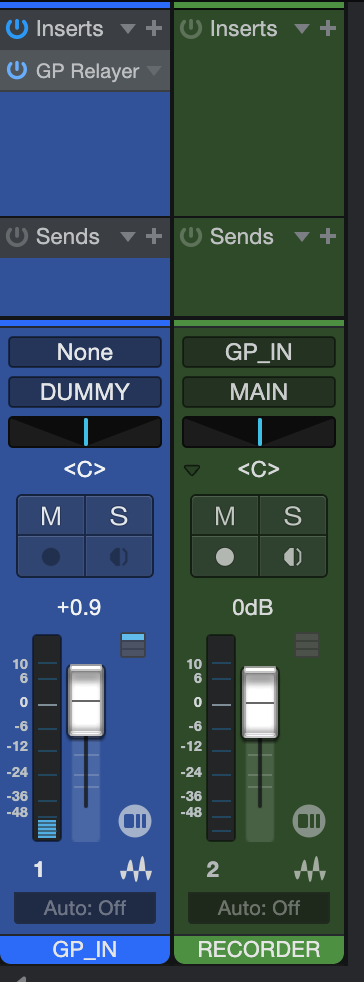
If you want to record the signal coming from Gig Performer, the easiest way is to create a second audio track and select the first track (with GP Relayer inserted) as the audio input. The signal from your first track (GP Relayer Input on the screenshot) can now be recorded to the second track.
How to send audio from Studio One to Gig Performer
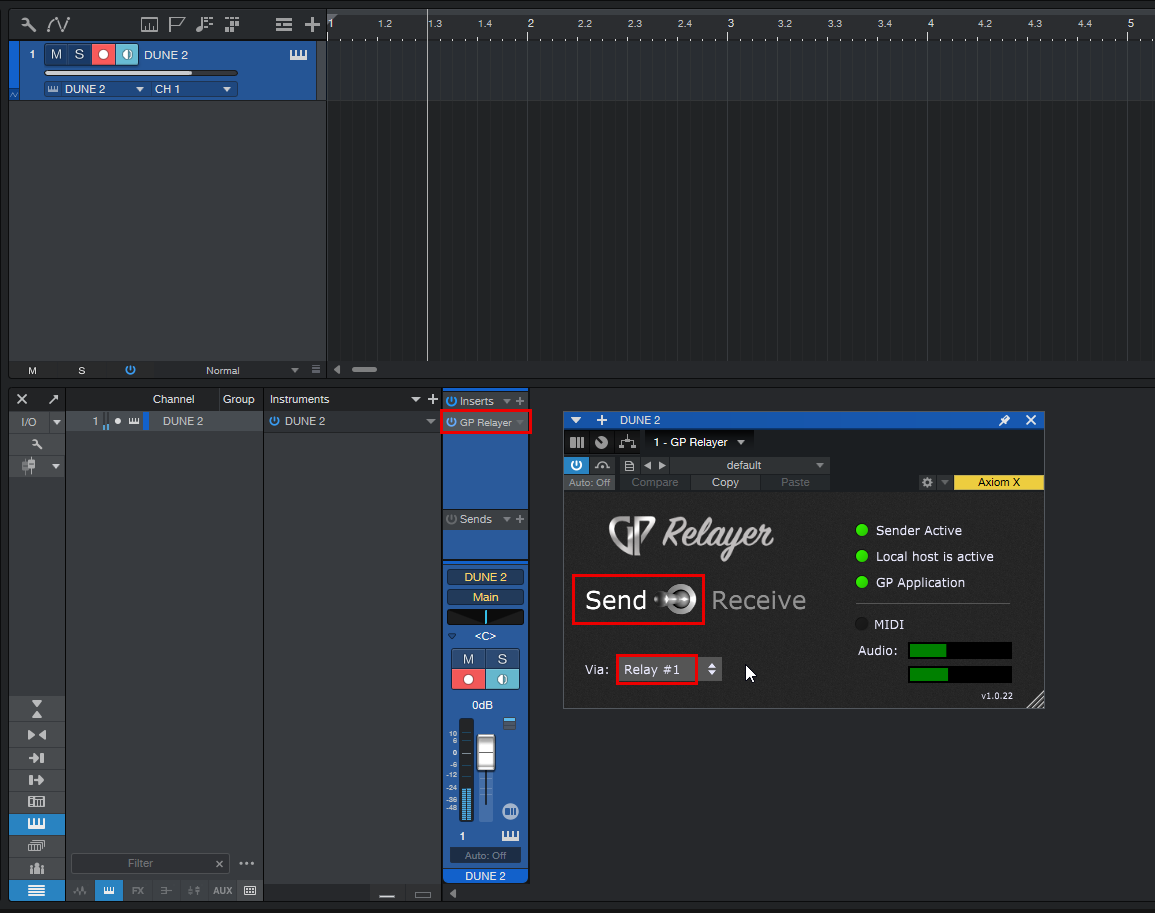
In Studio One, add the GP Relayer plug-in to the insert slot of the audio or instrument track you want to send to Gig Performer. In the GP Relayer plug-in window, make sure that Send is selected and select a relay in the Via select box, for example, Relay #1.
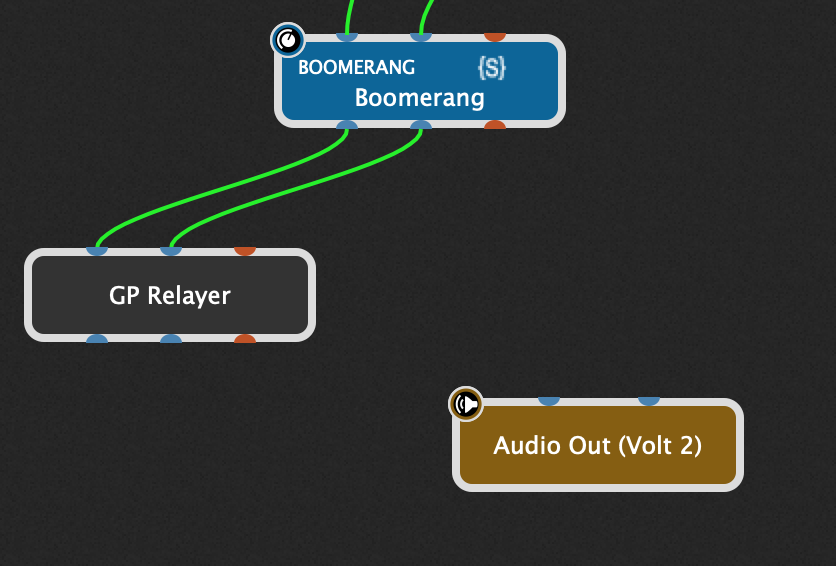
Studio One will now send the audio from this track to Relay #1. In Gig Performer, add a GP Relayer Block and connect its audio outputs to your Audio Out (or any other audio destination). In the GP Relayer window, select Receive and choose Relay #1, which we have set up in Studio One. Gig Performer will now receive audio from Studio One.
How to send MIDI from Gig Performer to Studio One
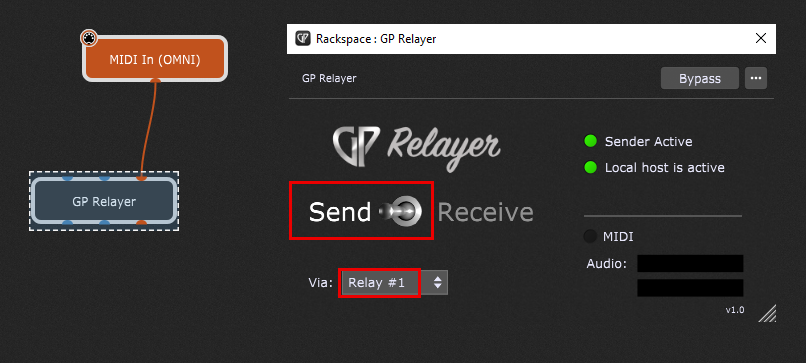
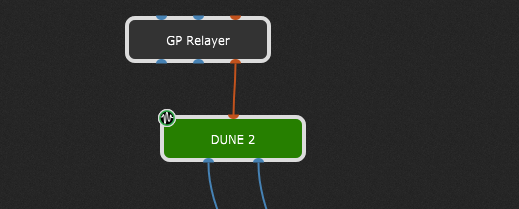
In Gig Performer, insert a GP Relayer Block in the Wiring view and connect your MIDI source to the MIDI input of the GP Relayer Block.
In the GP Relayer window, make sure that Send is selected. In the Via section, choose a desired Relay, for example Relay #1.
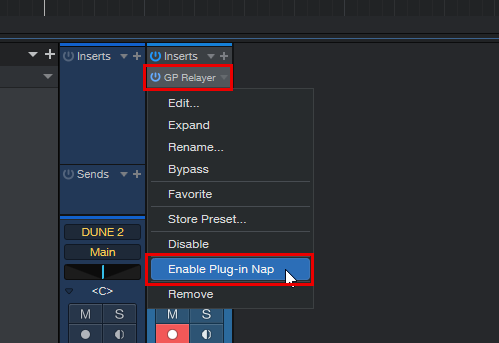
In Studio One, add an audio track. Since Studio One lists the GP Relayer plug-in as an audio effect, we need this audio track. Add the GP Relayer plug-in to the insert slot of this audio track/channel in the mixer. If you are using Studio One 5.4 or higher, right-click on GP Relayer and make sure that Enable Plug-in Nap is unchecked. This is very important, otherwise Studio One will automatically nap this plug-in if no audio signal is received.
In the GP Relayer plug-in window, select Receive and choose the correct Relay (for example Relay #1).
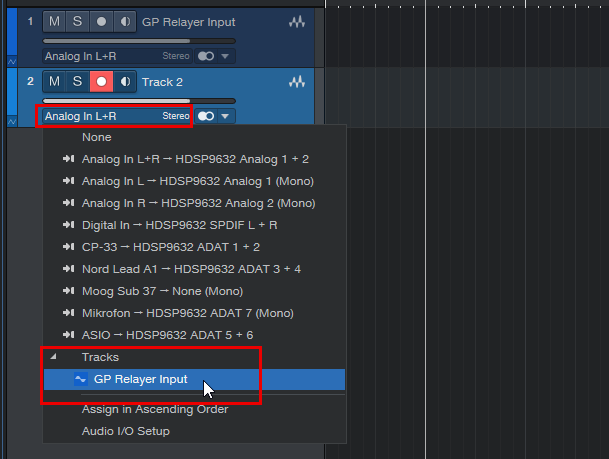
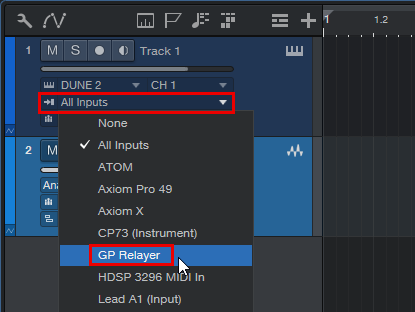
You are now ready to add a new instrument track. In the track controls, select GP Relayer as the input.
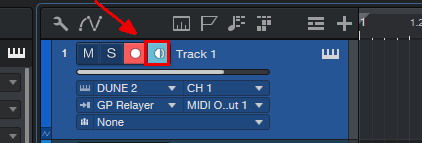
As soon as you send any MIDI data to GP Relayer in Gig Performer, the instrument track in Studio One will receive this data and and play the instrument you’ve selected for this track (in this example, it’s DUNE 2). Make sure that the Monitor button for the instrument track is activated, otherwise no notes will be sent to the instrument.
How to send MIDI from Studio One, Gig Performer
To send MIDI data from Studio One to Gig Performer In Studio One, the steps for sending MIDI data are very similar to those for receiving MIDI data. You will also need the audio track with GP Relayer inserted as an insert effect (don’t forget to disable Plug-in Nap!). The only difference is that you select GP as the output of your instrument track.

For MIDI input, use All Inputs or the specific MIDI input device you want to use.
In Gig Performer, connect the MIDI output of the GP Relayer Block to the instrument of your choice.
Now you can send MIDI data in Studio One and receive it in Gig Performer.